Create a print button for Lightning Experience
Preparation
Configure the following settings in
 Environment Settings - Salesforce - Print Button to be Created.
System administrator permission is required to configure the settings.
Select
 Lightning Experience.
Clear
 Salesforce Classic.
Restrictions
Depending on the type of buttons, the position where you can place the button differs.
Print button
Action area on the detail page
List view on the search layout
Drop-down button
Action area on the detail page
When the print button is clicked, the preview screen is displayed with the screen transitioning in the same window.
You need to do additional work to output forms using Experience Cloud. For details on the work, see "SVF Cloud for Salesforce Development Guide" - "Call from Experience Cloud".
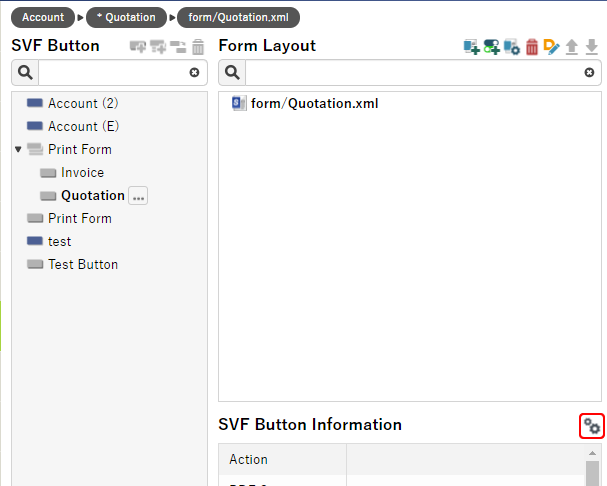
Log in to SVF Cloud Manager, and open the
 SVF Button Settings screen.
If the Salesforce login screen appears, enter login information to login.
In Salesforce Object, specify the Salesforce object to be used as the data source.
Reference
If the target object is not displayed in the list
All objects will be displayed by switching
 to
to  .
.Click
 or
or  in SVF Button to add an SVF button.
Add an SVF button.
Add a "drop-down button" to consolidate multiple buttons into one.
 Figure 1. Example of buttons shown on Salesforce (after creating print buttons)
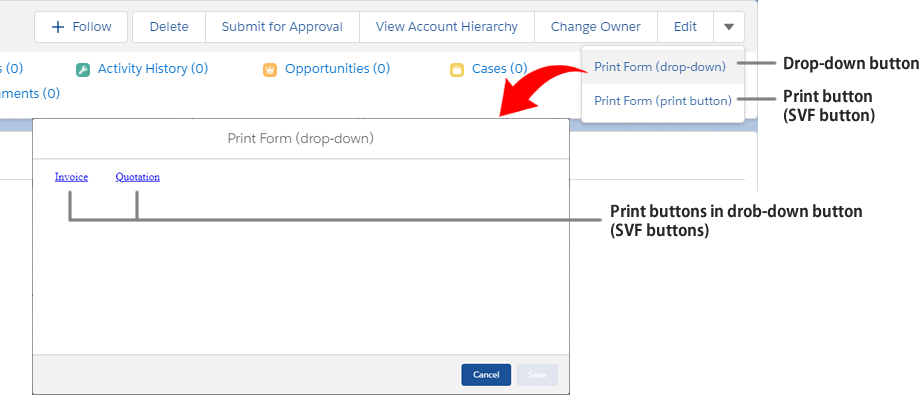
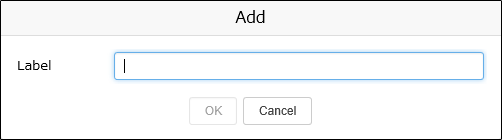
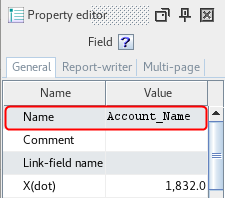
In Label, specify the label of SVF button. It is also used as the name of the print button if you create a print button.
(When adding a drop-down button)
Click
 - Add to add SVF buttons to consolidate into a drop-down button. As in the previous step, specify the label.
Click
 in Form Layout to specify the form layout.
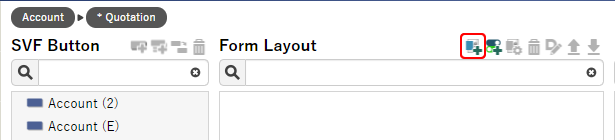
If you use the existing form layout, skip the next step and go to step 8.
Specify a hierarchy to save the new form layout and click the New button.

Reference
Create a hierarchy
To create a hierarchy, create a new folder in any hierarchy under the "form" folder on the
 Resource screen.
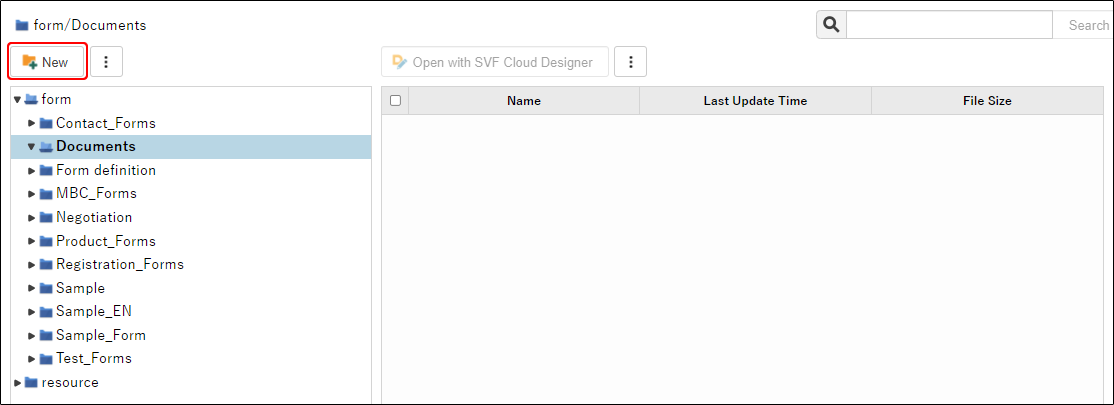
Select a form layout to use, and click the Select button.
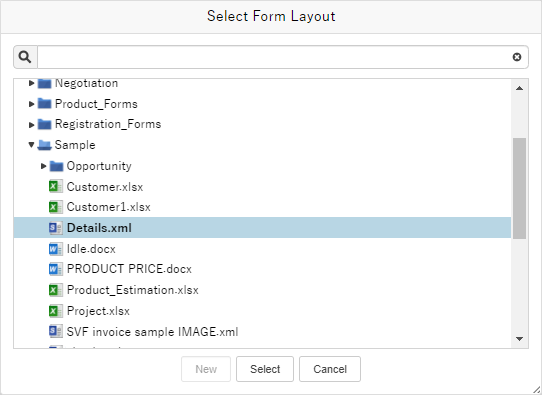
If a field is already placed in the form layout, that information is displayed in the Field.
If you select a form layout with an extension other than "xml", skip the following steps and go to step 18.
Reference
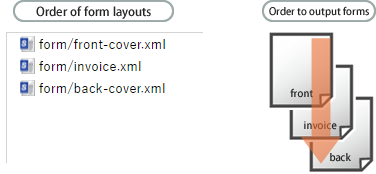
Specify multiple form layouts
You can specify multiple form layouts for one button only when the extension of the form layout is "xml".
In this case, the form is output according to the order of the form layouts on the screen. The order can be changed by
 and
and  .
.
To specify a Salesforce field to output to the form, click
 in Field.
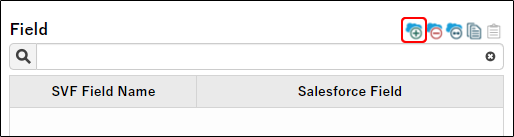
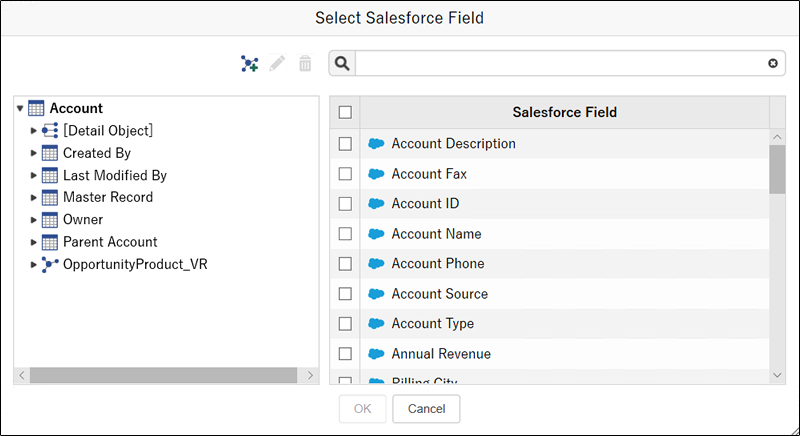
Specify the Salesforce field to output to the form in Salesforce Field on the right side. (You can select multiple fields.)
To output a Salesforce field of the related object, specify the object in the list on the left.
Reference
Object range
For details on the range of Salesforce objects that can be output to forms, see "Notes and Restrictions" - "SVF Cloud for Salesforce".
To design a form layout with SVF Cloud Designer, click
 in Form Layout.
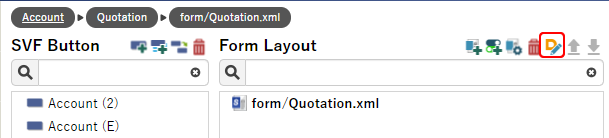
For SVF Cloud Designer Client (AIR version)
If you drag and drop an item of "fields.csv" in the References window onto the Form Editor, you can place a field that outputs a Salesforce field on the form layout.
If the References window is not displayed, click the
 References button.
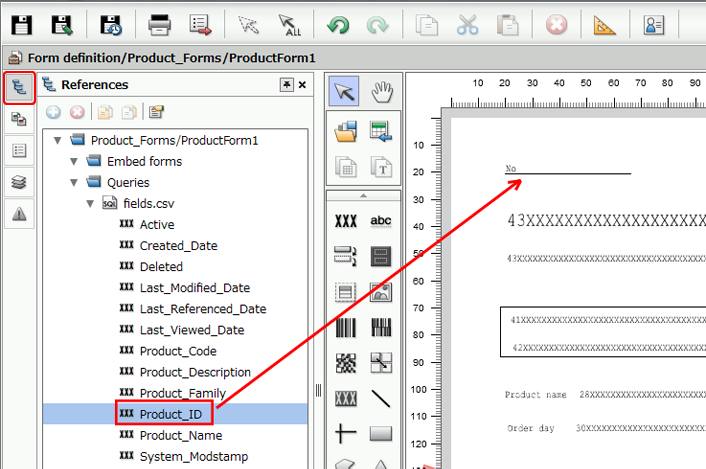
Caution
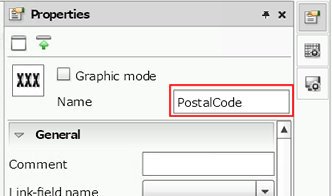
Field name
It is recommended to keep the default names for fields placed by drag and drop.
If changed, automatic mapping by field mapping may not be performed in a later step.
For SVF Cloud X-Designer
If you drag and drop an item in Library window onto the form window, you can place a field that outputs a Salesforce field on the form layout.
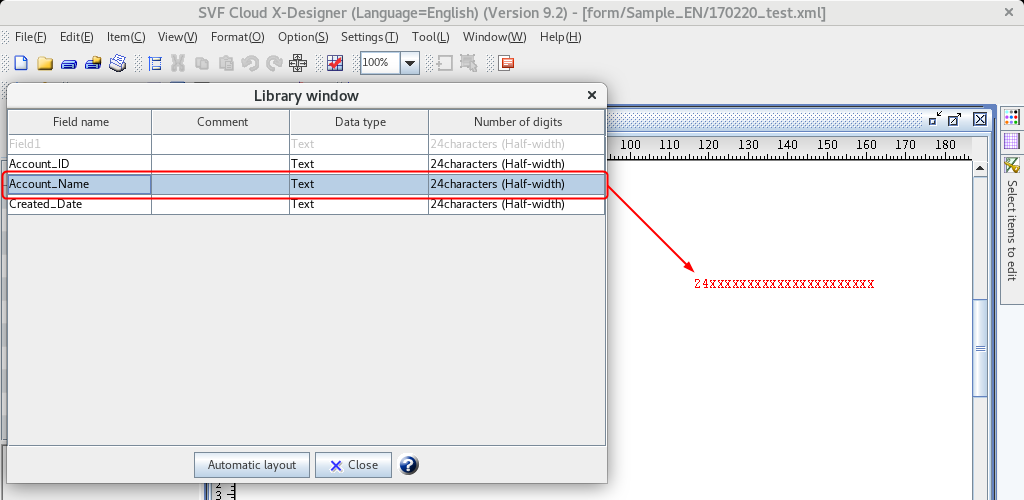
Once you close the Library window , the items cannot be displayed again. Exit SVF Cloud X-Designer once and start it again from the
SVF Button Settings screen.Caution
Field name
It is recommended to keep the default names for fields placed by drag and drop.
If changed, automatic mapping by field mapping may not be performed in a later step.
Design a form layout by inputting characters or creating a table.
For details on how to use SVF Cloud Designer, see "SVF Cloud Designer Creating Forms" or "SVF Cloud X-Designer Form Creation Guide".
Once you have finished creating a form layout, exit SVF Cloud Designer.
Click
 to map the fields placed in the form layout to Salesforce fields.
Rows with matching SVF field name and Salesforce field name are automatically mapped. (You can manually modify the automatic mapping results later.)
Note that Salesforce field names are compared internally converted to a string that conforms to the naming conventions for SVF field names. (For example, half-width numbers specified for the first character, and all symbols other than underscore symbol "_" will be replaced with underscore symbols.)

When clicking the Salesforce Field field, you can specify a Salesforce field for each SVF field.
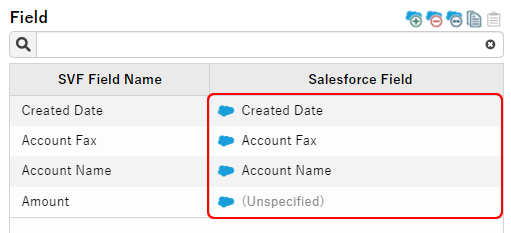
To clear the Salesforce Field field, click
 .
.Click
 in SVF Button Information to set SVF button details including how to output forms (actions).
For details on the setting items, see "Advanced setting items of the SVF button".
The settings and notes differ depending on the output method. For details, see the page for each output method.
Click the Save button to save the SVF button settings.

Click the Create Print Button button to create a print button using the saved settings of the SVF button.

By clicking the OK button on the completion screen, the creation of the print button is complete.
Proceed to "Adding Action in Lightning Experience" only when you use the drop-down button.
Add action in Lightning Experience
If you use drop-down buttons in Lightning Experience, you need to add action in Salesforce after creating a print button in SVF Cloud Manager.
Log in to Salesforce.
From Setup in Salesforce, open the Buttons, Links, and Actions page of the object on which you created the print button.
Click the New Action button.

Set the details of the action as follows. For a setting item not listed in the table, specify any value.
Setting item
Setting
Action Type
Custom Visualforce
Visualforce Page
Select the created drop-down button (starting with "SVFLEX <number>")

Click the Save button.
When the action detail screen is displayed, adding the action is complete.
In the action area of the detail page, place the action you created here instead of the print button.