Transfer a form to a client PC.
Forms generated by SVF Cloud can be stored in a folder via the SVF Cloud Agent installed on the client PC.
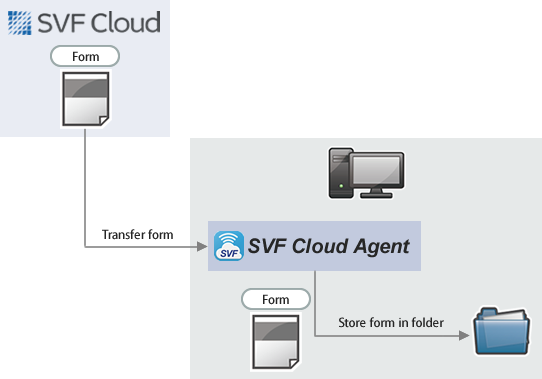
This section explains the settings required to transfer a form to a client PC.
SVF Cloud for Salesforce
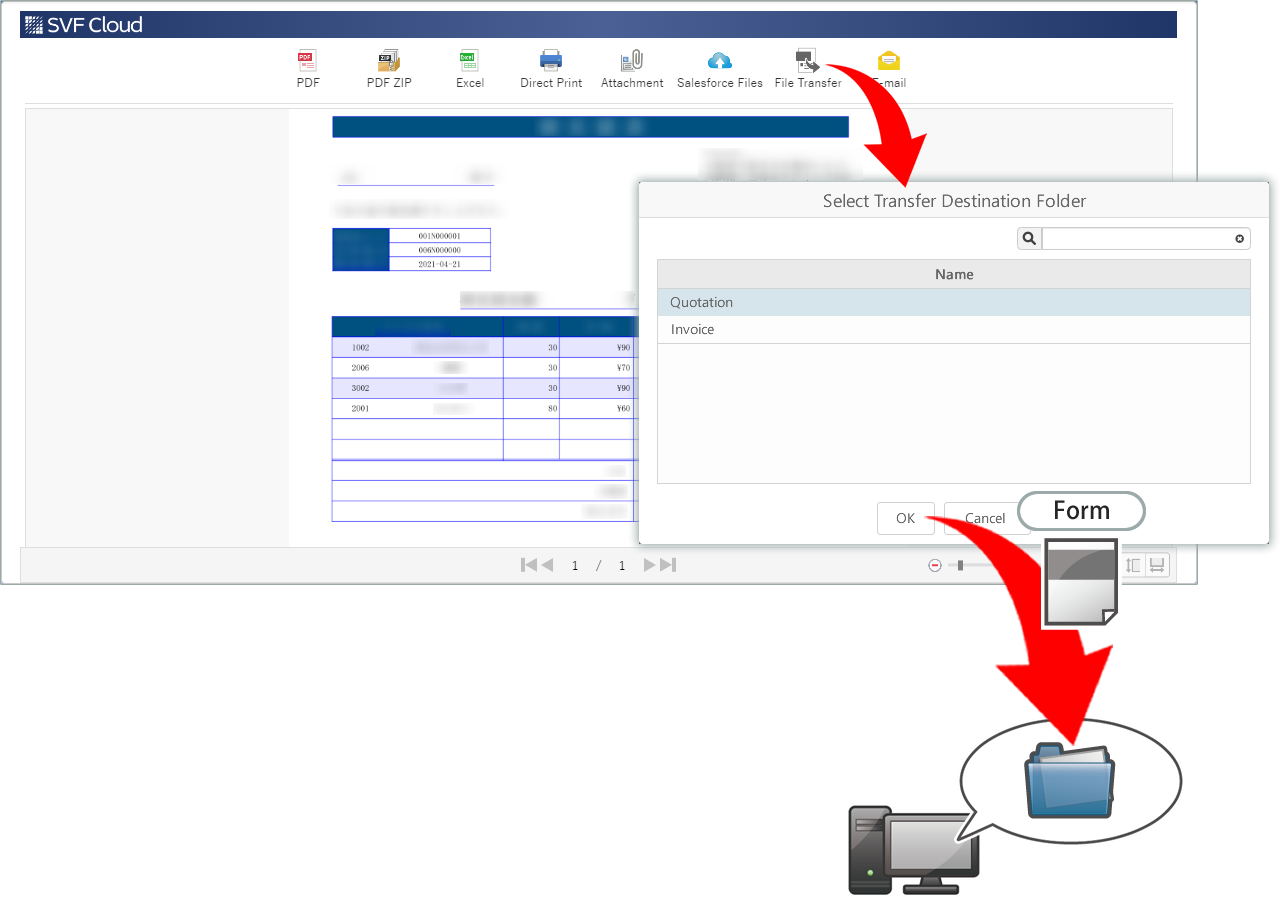
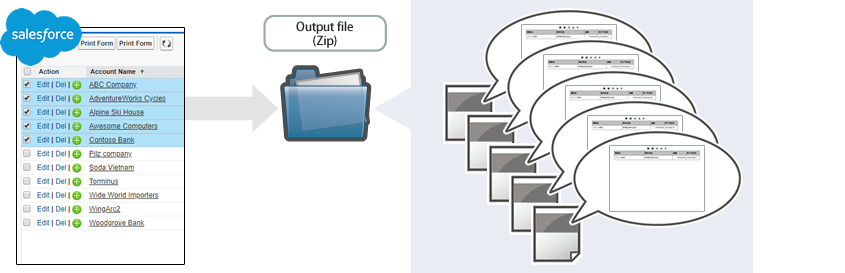
Clicking the File Transfer icon on the preview screen will display the Transfer Destination Folder screen. When you specify a destination folder, the form will be transferred to the folder on the client PC.
If multiple records are selected, multiple forms are compressed into a ZIP file.
 |
Caution
You cannot transfer if you have not registered the transfer destination folder in SVF Cloud Manager.
You can transfer only to Windows client PC where SVF Cloud Agent is installed.
The transfer destination folder registered in the online SVF Cloud Agent is displayed on the Transfer Destination Folder screen.
If a file with the same name as the form to be transferred exists in the transfer destination folder, it will be overwritten.
Reference
If there is only one transfer destination you can select, the Transfer Destination Folder screen is skipped and the form is transferred.
Transfer settings
Install SVF Cloud Agent
If you have already installed SVF Cloud Agent, this step is not necessary.
Install SVF Cloud Agent on the client PC to which you want to transfer forms. The workflow is as follows.
The system administrator creates an installation package.
For details, see "Install SVF Cloud Agent on the client PC".
Install SVF Cloud Agent on the client PC using the installation package.
Install it by specifying "Launch Service" as launch method. For details on installation procedure, see "SVF Cloud Agent Setup Guide."
Register transfer destination folder
On the  Agent screen of SVF Cloud Manager, register the folder to which the forms will be transferred.
From the list of agents, select the SVF Cloud Agent installed on the client PC to which you want to transfer.
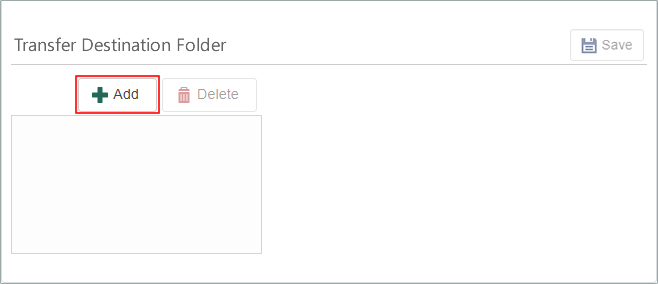
On the details screen, click Transfer Destination Folder > Add button.
Reference
If the selected SVF Cloud Agent is installed with "Launch Startup", Transfer Destination Folder will not be displayed.
On the Add New Transfer Destination Folder screen, set the following:
Setting item
Setting
Name
Folder display name
Path
The full path to the destination folder (e.g. C:\Users\name\Desktop\)
Click the Save button.
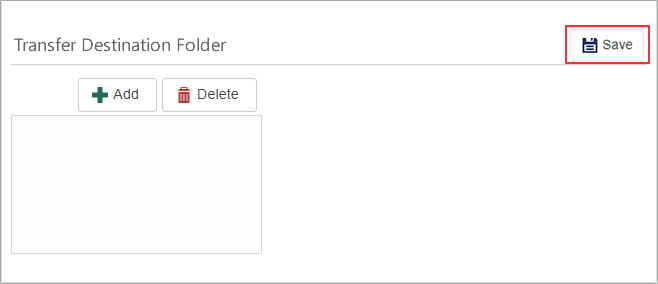
This completes the registration of the destination folder.
Create a form layout
You can create a form layout by using the form layout creation tool. Note that the type of a generated form will differ depending on the type of form layout.
Types of form layouts | Types of forms generated |
|---|---|
XML file | PDF file |
Excel file | Excel file |
Word file | Word file |
Set SVF buttons
On the  SVF Button Settings screen of the SVF Cloud Manager, set the following.
Setting item | Setting |
|---|---|
SVF Button Information - | In the list of actions, select |

Caution
When you have changed the existing SVF button settings, you need to create the print button again.
Reference
The above is the minimum required settings to transfer a form to a client PC. See "2. Set SVF button in Sandbox environment" for common settings regardless of output method.
Optional settings
The settings that can be made vary depending on the type of form layout.
Common to all form layouts
For XML files
Configure the settings on SVF Cloud Manager. Go to the SVF Button Settings screen - SVF Button Information -  - Settings screen.
Output multiple records with separating files by record
When outputting multiple records, separate files by record, and compress them into one Zip file.
 |
Setting item | Setting |
|---|---|
File tab - Switch Form Layout | On |
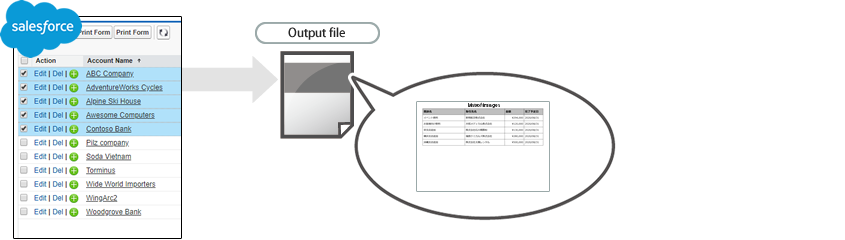
Output multiple records without separating
Output multiple records into one file without separating them by of record, and compress it into one Zip file.
 |
Setting item | Setting |
|---|---|
File tab - Switch Form Layout | Off |
Output PDF file with document security enabled
You can specify it when the form layout is an XML file.
This restricts operations on PDF files.
Setting item | Setting |
|---|---|
PDF tab - PDF Security Options | On (For details on each setting, see "Advanced setting items of the SVF button") |