4-6-5 Create output area for 2D barcode
SVF Cloud Designer provides a feature to output the contents of the field set in the XML form file as a 2D barcode according to the property settings of the 2D barcode output area.
Restriction
You cannot include 2D barcodes in a repetition.
You cannot output 2D barcodes to dot matrix printers.
You cannot output 2D barcodes in forms containing multiple repeat item items with different numbers of rows.
Place a 2D barcode
Use the following procedure to place a 2D barcode:
Click the
 Create 2D barcode button on the toolbox and move the pointer to any place of the Form Editor.
The pointer changes to
 .
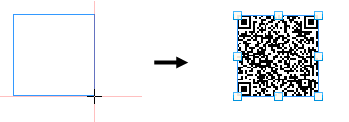
.Drag the mouse to make a rectangle using the guidelines as a reference in Form Editor.
A 2D barcode is then placed.
2D barcode is created
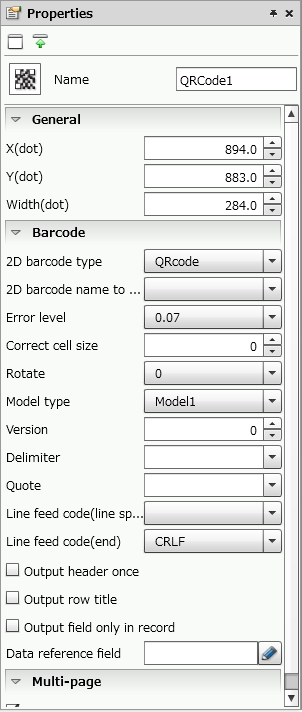
Set the properties for the placed 2D barcode with the Property editor.
Set the 2D barcode properties
Set the 2D barcode properties. Properties are categorized as General, Barcode and Multi-page.
The properties you can set depend on the 2D barcode type. See the applicable items.
2D barcode properties
Common settings
Item | Description |
|---|---|
Name | Type a name for the 2D barcode. If a name is not specified, it is automatically specified sequentially starting from "QRCode1". You can use alphanumeric characters, Kana, Kanji, and underscores (_). The name can be up to 30 bytes in length. Do not use a number for the first character of the name. |
General
Item | Description |
|---|---|
X(dot) | Specify the X coordinate of the upper left corner of the 2D barcode. You can also change the value by clicking the |
Y(dot) | Specify the Y coordinate of the upper left corner of the 2D barcode. You can also change the value by clicking the |
Width(dot) | Specify the horizontal length in dots. As per the specifications of the Maxicode, set the width of the Maxicode between 26.48 mm (minimum) and 29.79 mm (maximum). You can also change the value by clicking the |
Height(dot) (only for PDF417) | Specify the height in dots. You can also change the value by clicking the |
Attribute-formula | Specify an attribute-formula. For details on attribute-formula, see "6-3-1 Set attribute-formula". |

Barcode
2D barcode type | Specify a 2D barcode type from "QRcode", "Maxicode", "PDF417", and "DataMatrix". "DataMatrix" is supported from Service Pack 2. 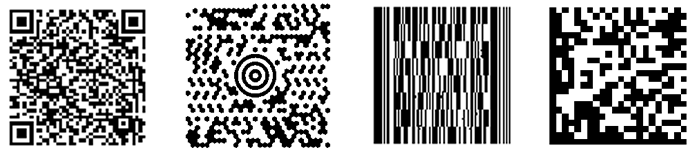 "QRcode" "Maxicode" "PDF417" "DataMatrix" Caution
|
2D barcode name to append to (supports Service Pack 2) | When you combine several 2D barcodes, specify the name of a 2D barcode to append to. Data that could not be stored in one 2D barcode can be output to the 2D barcode to append to. Different types of 2D barcode names cannot be selected. It is not displayed when 2D barcode type is "QRcode" and Model type is "Micro QR". Reference
Caution
|
Error level | Specify the error level. Specifying the error level helps restore the information when reading the characters, even if some data characters get corrupted. This setting does not appear if the 2D barcode type is "DataMatrix". For QRcode, specify an error level from 0.07, 0.15, 0.25 or 0.3. However, if "Micro QR" is selected in Model type, 0.3 cannot be specified. For Maxicode, specify from 0.25 (standard error level) or 0.5 (extended error level). For PDF417, specify an error level within the range of 0 to 8. The higher the setting value, the more codewords to correct. |
Correct cell size | You can correct the cell size. Specify a value between -11 and 11. You can also change the value by clicking the |
Rotate | Specify the rotation angle. |
Model type (QRcode only) | Specify the model type.
|
Version | Specify the version of QRcode or DataMatrix. The ranges of values that you can specify for each version are as follows:
|
Delimiter | Specify a delimiter. You can select "None", "Comma", or "TAB", or input any character directly to specify. |
Quote | Specify a quote. You can select double quotes ("), single quote (') or blank, or type any character directly to specify. |
Line feed code(line spacing) | Select a line feed code (line spacing) from "None", "CR", "LF" or "CRLF". |
Line feed code(end) | Select a line feed code (end) from "None", "CR", "LF" or "CRLF". |
Output header once | Specify whether to output the header row and details lines as a single record each. If you select the check box, the header line is output only once. |
Output row title | Specify whether to output the row title in the first row of the data. If you select the check box, the row title is entered in the first row of the data. |
Symbol combination (only in Maxicode) | If you select the check box, the symbol structures are combined. |
Country code (only in Maxicode) | Select the fields in which the country code data is to be set. |
Postal code (only in Maxicode) | Select the fields in which the postal code data is set. |
Service class field (only in Maxicode) | Select the fields in which the service class data is set. |
Output field only in record | Select the check box if you want to output only the data for each record output timing to the 2D barcode when 2D barcodes are designed in the record. If you clear the check box, information for all the records on the page is output. |
Data reference field | Specify the fields to which the data is referred when creating a 2D barcode. Click the 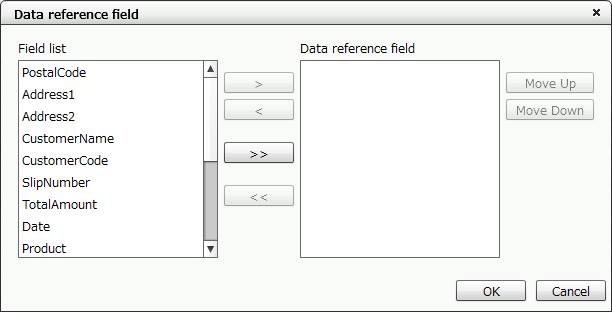 "Data reference field" dialog The fields currently created in the form are listed in Field list. Select a reference field from the list and click the > button. Click the ≫ button to move all the fields to Data reference field. Select a field name in Data reference field and click < button to delete it from Data reference field and move to Field list. Click the << button to delete all field names in Data reference field. The data output order is the display order in the Data reference field. To change the display order, click the Move Up or Move Down buttons while selecting the field name. Reference
CautionYou cannot reference a field with mask set in its properties. If you do not want to print the referenced field while referring to the data, use "Page Mask". For details, see "4-6-12 Set area excluded from printing (Page mask)". |

Multi-page
The settings of Multi-page are the same as those of fields. For details, see "Set the field properties" in "4-6-1 Create output area (fields) for text and numeric values".
Enlarge/reduce 2D barcode
You can change the area size by enlarging or reducing the size of a 2D barcode.
Select a 2D barcode.
Square handles appear around it.

A handle appears
Move the pointer near the square handle on either the corner or the vertical/horizontal side.
The pointer changes to
 .
.
The appearance of the pointer changes
Drag the pointer in any direction.
The size of the 2D barcode is enlarged or reduced and the area size changes.
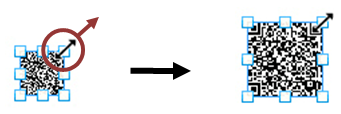
2D barcode enlarged in the dragging direction
Reference
You can also specify the area size in the Width(dot) field in properties.