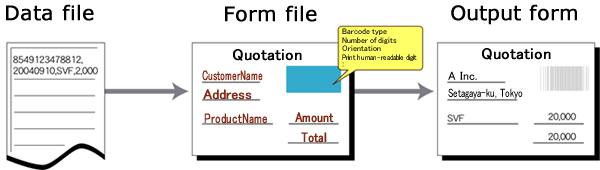
4-6-3 Create output area for barcodes
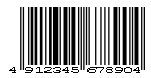
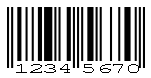
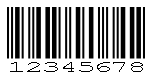
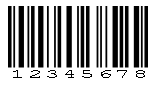
SVF Web Designer provides a feature for converting received data into various types of barcodes and printing them. NW7, CODE39, JAN, ITF, CODE128, Zip code (Customer barcode), CVS-EAN 128, Magazine barcode (JAN13 + Add-on) and EAN128 are supported.
If barcode accuracy is reduced depending on the printing environment, the density of barcodes, the element size and toner blurs can be adjusted in Barcode option.
Output data as a barcode
Caution
Since SVF Cloud does not allow the print engine to fine-tune the output barcode, such as specifying the output width, the output barcode may not be readable.
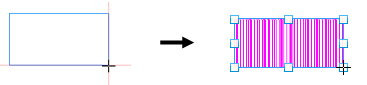
Place a barcode
Use the following procedure to place the barcode:
Click the
 Create barcode button on the toolbox and move the pointer to the Form Editor.
The pointer changes to
 .
.Drag the mouse to make a rectangle using the guidelines as a reference in Form Editor.
A barcode is placed.
Place a barcode
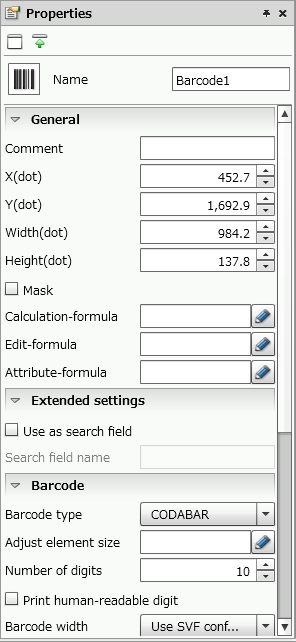
Set the properties for the placed barcode with the Property editor.
Set the barcode properties
Set the barcode properties. Barcode properties are grouped into the General, Extended settings, Barcode, Report-writer, and Multi-page.
Barcode properties
Reference
In the color specification field, you can select the color registered in Color palette settings in the paper Property editor. For details on how to set color palettes, see "4-11-2 Set a color palette".
Common settings
Item | Description |
|---|---|
Name | Type a barcode name. By default, it is automatically and sequentially specified from "Barcode1". You can use alphanumeric characters, Kana, Kanji, and underscores (_). The name can be up to 30 bytes in length. Do not use a number for the first character of the name. |
General
Item | Description |
|---|---|
Comment | Type comments for the barcode. |
X(dot) | Specify the X coordinate of the top left corner of the barcode. You can also change the value by clicking the |
Y(dot) | Specify the Y coordinate of the top left corner of the barcode. You can also change the value by clicking the 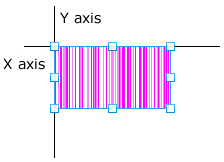 Positional relationship between "X(dot)" and" Y(dot)" |
Width(dot) | Specify the horizontal length in dots. You can also change the value by clicking the |
Height(dot) | Specify the vertical length in dots. You can also change the value by clicking the |
Mask | If the barcode is masked, the barcode data is not output. When the check box is selected, set the mask. When the check box is cleared, no mask is set. |
Calculation-formula, Edit-formula | Set when referring to the values of other fields. |
Attribute-formula | Specify an attribute-formula. For details on attribute-formula, see "6-3-1 Set attribute-formula". |

Extended settings
Item | Description |
|---|---|
Use as search field (supports Service Pack 2) | Specify whether to use as a search field in the cloud version of invoiceAgent Documents (hereafter referred to as iA Documents). When you select the check box, the search field information is added to PDF files that are output with SVF for PDF. The assigned information is used as search conditions and sorting conditions in iA Documents. For details, see the product manuals for iA Documents. Caution
|
Search field name (supports Service Pack 2) | If you select the Use as search field check box, specify a search field name. The initial value is the same as Name of the barcode. You can use alphanumeric characters, Kana, Kanji, and underscores (_). The name can be up to 30 bytes in length. Do not use a number for the first character of a search field name. Caution
|
Barcode
Item | Description | ||||||||||||
|---|---|---|---|---|---|---|---|---|---|---|---|---|---|
Barcode type | Select the type of barcode to be printed. Restriction
| ||||||||||||
Adjust element size | Adjust the element size. Click the 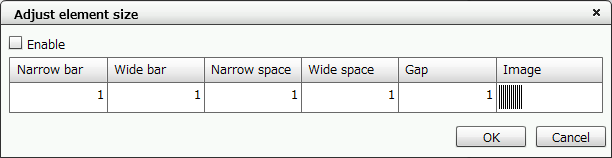 "Adjust element size" dialog You can set each numerical value by selecting Enable. After settings, click the OK button to close the Adjust element size dialog. | ||||||||||||
Number of digits | Specify the number of digits to be output. The number of digits depends on the barcode type. When "JAN/EAN-13", "JAN/EAN-8", "zip code", "CVS-EAN128" or "magazine barcode" are specified in Barcode type, a fixed number of digits will be displayed. In other cases, any number of digits can be specified. | ||||||||||||
point | Specify a point in the range of 8.0 to 11.5 only for "Zip code". CautionThe decimal point can be specified only when decimal places are displayed. For details on how to set it up, see "Display settings" in "4-3-1 Use the auxiliary features for layout". | ||||||||||||
Print human-readable digit | Specify whether to print human-readable digits below the barcode. A dot printer cannot output human-readable digits. When this check box is selected, human-readable digits are output. The characters sent for the barcode are printed below the barcode. When the check box is cleared, only the barcode is output without human-readable digits. ReferenceFor details of restrictions on SATO and TEC, see the manuals for each product. | ||||||||||||
Barcode width | Specify the printing method when the data length at the time of printing is different from the number of digits specified in design.
| ||||||||||||
Direction | Specify the printing direction of the barcode.
|


Report-writer
The settings of Report-writer are the same as those of fields. For details, see "Set the field properties" in "4-6-1 Create output area (fields) for text and numeric values".
Multi-page
The settings of Multi-page are the same as those of fields. For details, see "Set the field properties" in "4-6-1 Create output area (fields) for text and numeric values".
Enlarge/reduce barcode
You can change the width and height of a barcode by enlarging or reducing it.
Select a barcode.
Move the pointer close to the square handles displayed around the barcode.
While the mouse cursor display changes to
 , drag in any direction.
The barcode size is enlarged or reduced.
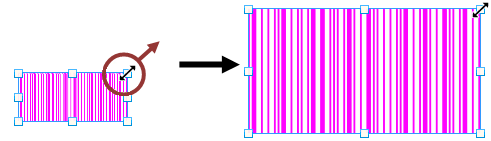
The barcode is enlarged in the dragging direction
Caution
If the barcode type is Zip code, the size cannot be enlarged or reduced.
Set barcode correction
You can set the density of the barcode and the element size. You can also improve reading efficiency when there are toner blurs.
Follow the procedure below to set barcode correction:
Click the Barcode option button in the Property editor for paper.
Set various items in the Barcode option dialog.
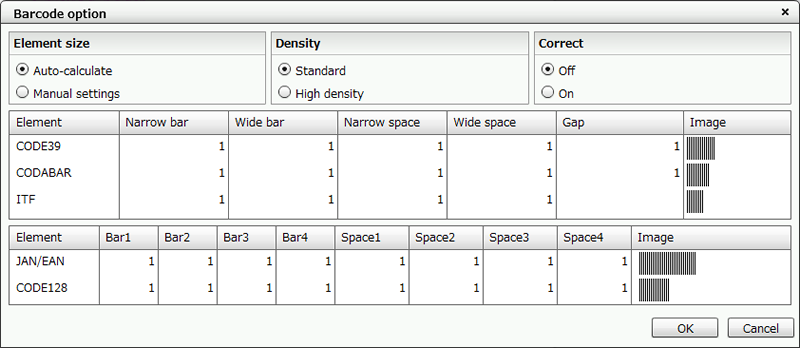
"Barcode option" dialog
Item
Description
Element size
Auto-calculate
Automatically calculates the element size according to the specified barcode printing width and number of digits. If the calculation result is less than the minimum printing width specified in Density, the barcode is not output.
Manual settings
The width of each element can be specified arbitrarily in dots.
Density
Specify the minimum output width of Medium1 element.
Standard
3 dots
High density
2 dots
Correct
Correct toner blurs.
Off
Outputs according to the calculation result.
On
Outputs the barcode by adding a correction value to the calculated element width.
Reference
When specifying Element size in Manual settings, make sure that you understand the element configuration.
The dot width of an element depends on the dot density of the printer. If the output printer cannot be specified, output using Auto-calculate.
The output result with High density is influenced by the performance of the barcode reader and the printer as well as the quality of paper. If data cannot be read by the barcode reader, output with Standard.
It is recommended to output in correction mode when verifying with a barcode verifier.
For manual calculation of the element size, CODE39 is referenced in "CODE39" and "CODE39 with check digit". JAN is referred in "JAN/EAN-13", "JAN/EAN-8", and "JAN/EAN-13 add-on 5". CODE128 is referenced in "CODE128", "EAN128", and "CVS-EAN128".
Click the OK button to close the Barcode option dialog.