Send a form as a document to CloudSign
To use this feature, you will need to sign up for our optional contract (only if your SVF Cloud contract is the old plan).
You can generate a PDF file with SVF Cloud and send it as a document to CloudSign.
This section explains the settings required to send a form to CloudSign as a document.
Reference
The old SVF Cloud plans are the plans with names S, M, L, LL, XL, and XXL.
For information on operation of CloudSign, see CloudSign manual or other documentation.
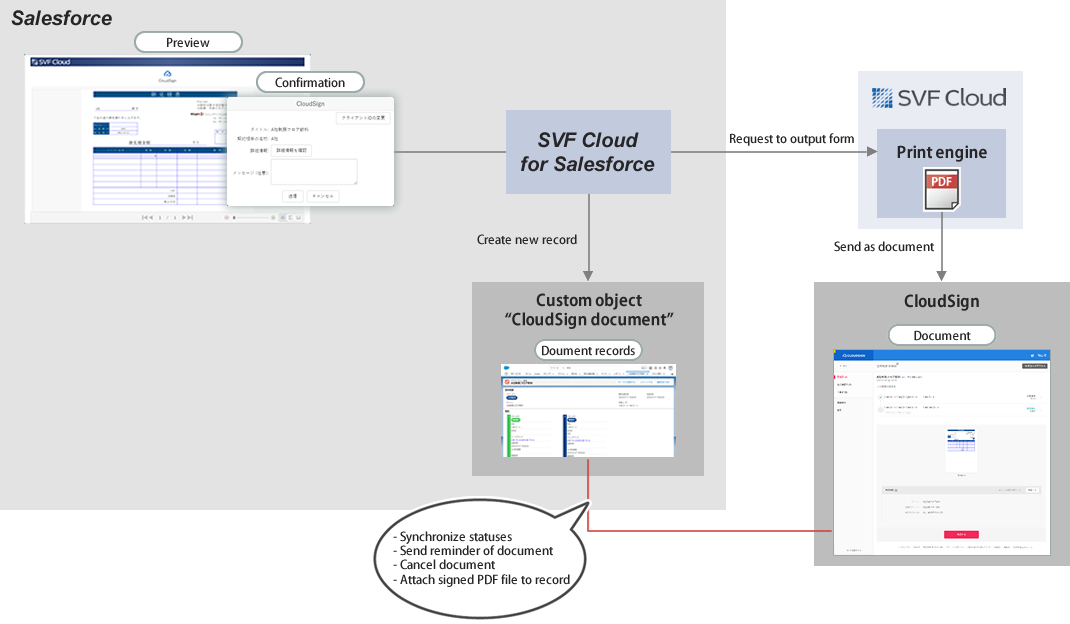
SVF Cloud for Salesforce
On the preview screen, clicking the CloudSign icon will display a confirmation screen for the contents to be submitted. For details on the confirmation screen, see "Fields displayed on the confirmation screen for transmission".
Clicking the Send button on the confirmation screen will output a PDF file of the form in SVF Cloud and send it as a document to CloudSign.
Upon submission, a new record will be created in the Salesforce custom object "CloudSign Document". This record will be linked to the document on CloudSign. For details of CloudSign documents, see " Custom object "CloudSign Documents"".
Configure integration with CloudSign
CloudSign Contract
Apply to use CloudSign. You need a "Corporate" plan or higher to use the Web API feature.
Optional contracts
This is only necessary if you are using the old SVF Cloud plan.
Please apply to us for the option to use this feature.
Enable CloudSign integration feature for your tenant
This is only necessary if you are using the old SVF Cloud plan.
The integration feature will be enabled by us. Contact our support.
Set up CloudSign integration
If you have already set up the CloudSign integration, this step is not necessary.
Set up CloudSign integration. For details on setup procedure, see "SVF Cloud for Salesforce CloudSign Integration Setup Guide".
Create a form layout
Create a form layout of the XML file in SVF Cloud Designer. For details, see "Create a form layout with SVF Cloud Designer".
Set SVF buttons
On the  SVF Button Settings screen of the SVF Cloud Manager, set the following.
Setting item | Setting |
|---|---|
Form Layout | Select the form layout (XML file) |
SVF Button Information - | In the list of actions, select |

After selecting  , configure the detailed settings of the document to be sent. If any of the required fields are not specified, the OK button on the setting screen will not be enabled.
Setting item | Setting |
|---|---|
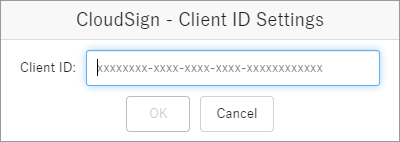
Client ID | Select from the following options how to specify the client ID of the CloudSign user to whom you want to send the document.
ReferenceIf you want to send a document to CloudSign Sandbox environment to see how it works, it is recommended that you select "Salesforce Field" or "Not specified". |
Document Pattern | Select from the following options how to create a document.
|
Template ID | Specify if you selected "Use Template ", "Add File to Template " or "Replace File of Template" for Document Pattern. Click the Edit button to specify the template to be used. After specifying a template and clicking the OK button, the values in the template will be reflected in the subsequent items. |
Replacement File | Specify if you selected "Replace File of Template" for Document Pattern. Specify which of the PDF files set in the template will be replaced with the output form. Only one PDF file can be replaced. |
Title | This is the same as the Title that you specify when creating a document in CloudSign. Select from the following options how to specify the title.
|
Name of Counterparty to Contract | This is the same as the Name of Counterparty to Contract that you specify when creating a document in CloudSign. Select from the following options how to specify the name of the counterparty to contract.
|
Send to | This is the same as the Send to that you specify when creating a document in CloudSign. Click the Edit button to set the recipients in the order in which it will be sent. The setting screen displays the number of recipients that have already been set up. If you use a template, the number of recipients already set up in the template is displayed in parentheses. Figure 1. If specified two recipients in the template and one additional recipient 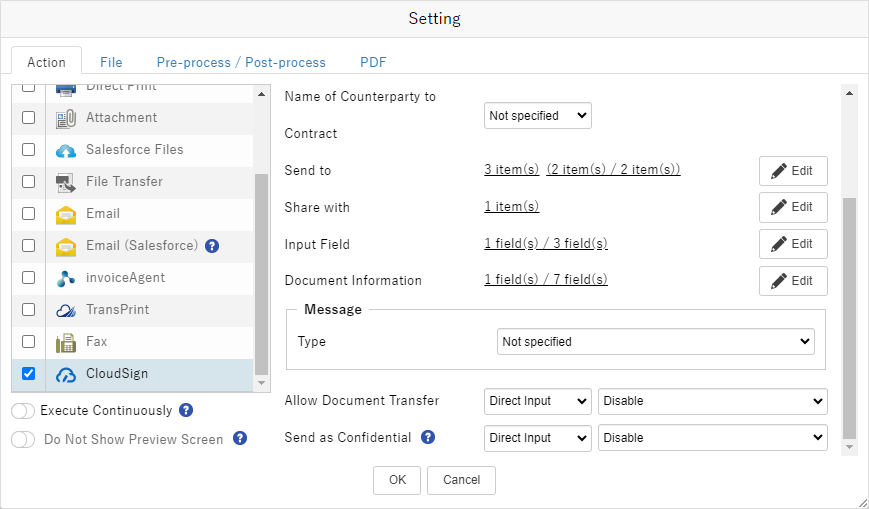 |
Share with | This is the same as the Share with that you specify when creating a document in CloudSign. Click the Edit button to set the share destination. The setting screen displays the number of share destinations that have already been set up. |
Input Field | Specify if you selected "Use Template ", "Add File to Template " or "Replace File of Template" for Document Pattern. This is the same as the Input Field that you specify when creating a document in CloudSign. Click the Edit button to display a list of input fields specified in the template. Click The number of input fields is displayed on the setting screen. The left-hand side shows the number of input fields for which "Label" and "Text" have already been set, while the right-hand side shows the number of input fields set in the template. Figure 2. If three input fields have been set in the template and the "Label" and "Text" for one of the input fields have already been set. |
Document Information | This is the same as the Document Information that you specify when creating a document in CloudSign. Click the Edit button to set the document information. The number of fields is displayed on the setting screen. The left-hand side shows the number of fields of document information that have already been set, while the right-hand side shows the number of all fields of document information. Figure 3. If one field of document information has already been set. |
Upload Recipient File | This is the same as Upload Request Settings that you specify when creating documents in CloudSign. Click the Edit button and set the upload request destination, whether the upload is required or optional, and the request details. |
Message | This is the same as the Message that you specify when creating a document in CloudSign. Select from the following options in Type how to specify the message.
|
Allow Document Transfer | This is the same as the Document Transfer that you specify when creating a document in CloudSign. Select from the following options how to specify.
|
Send as Confidential | This is the same as the Confidential that you specify when creating a document in CloudSign. The confidential feature must be available in CloudSign. Select from the following options how to specify.
|

Caution
When you have changed the existing SVF button settings, you need to create the print button again.
Reference
The above are the minimum settings required to send a form to CloudSign as a document. See "2. Set SVF button in Sandbox environment" for common settings regardless of output method.
Fields displayed on the confirmation screen for transmission
 This is displayed if 'Not specified' has been selected in Specify the client ID of the CloudSign user to whom you want to send the document. | 
|
Custom object "CloudSign Documents"
The "CloudSign Document" is a custom object that manages documents sent to CloudSign. This is created during the process of setting up the CloudSign integration.
When you send a document from SVF Cloud to CloudSign, a new record is created. The title of the document is used for the name of the record.
The records of the CloudSign documents are displayed from the related list of objects that were used as data sources (a lookup relationship must have been created between the objects during the setup process).
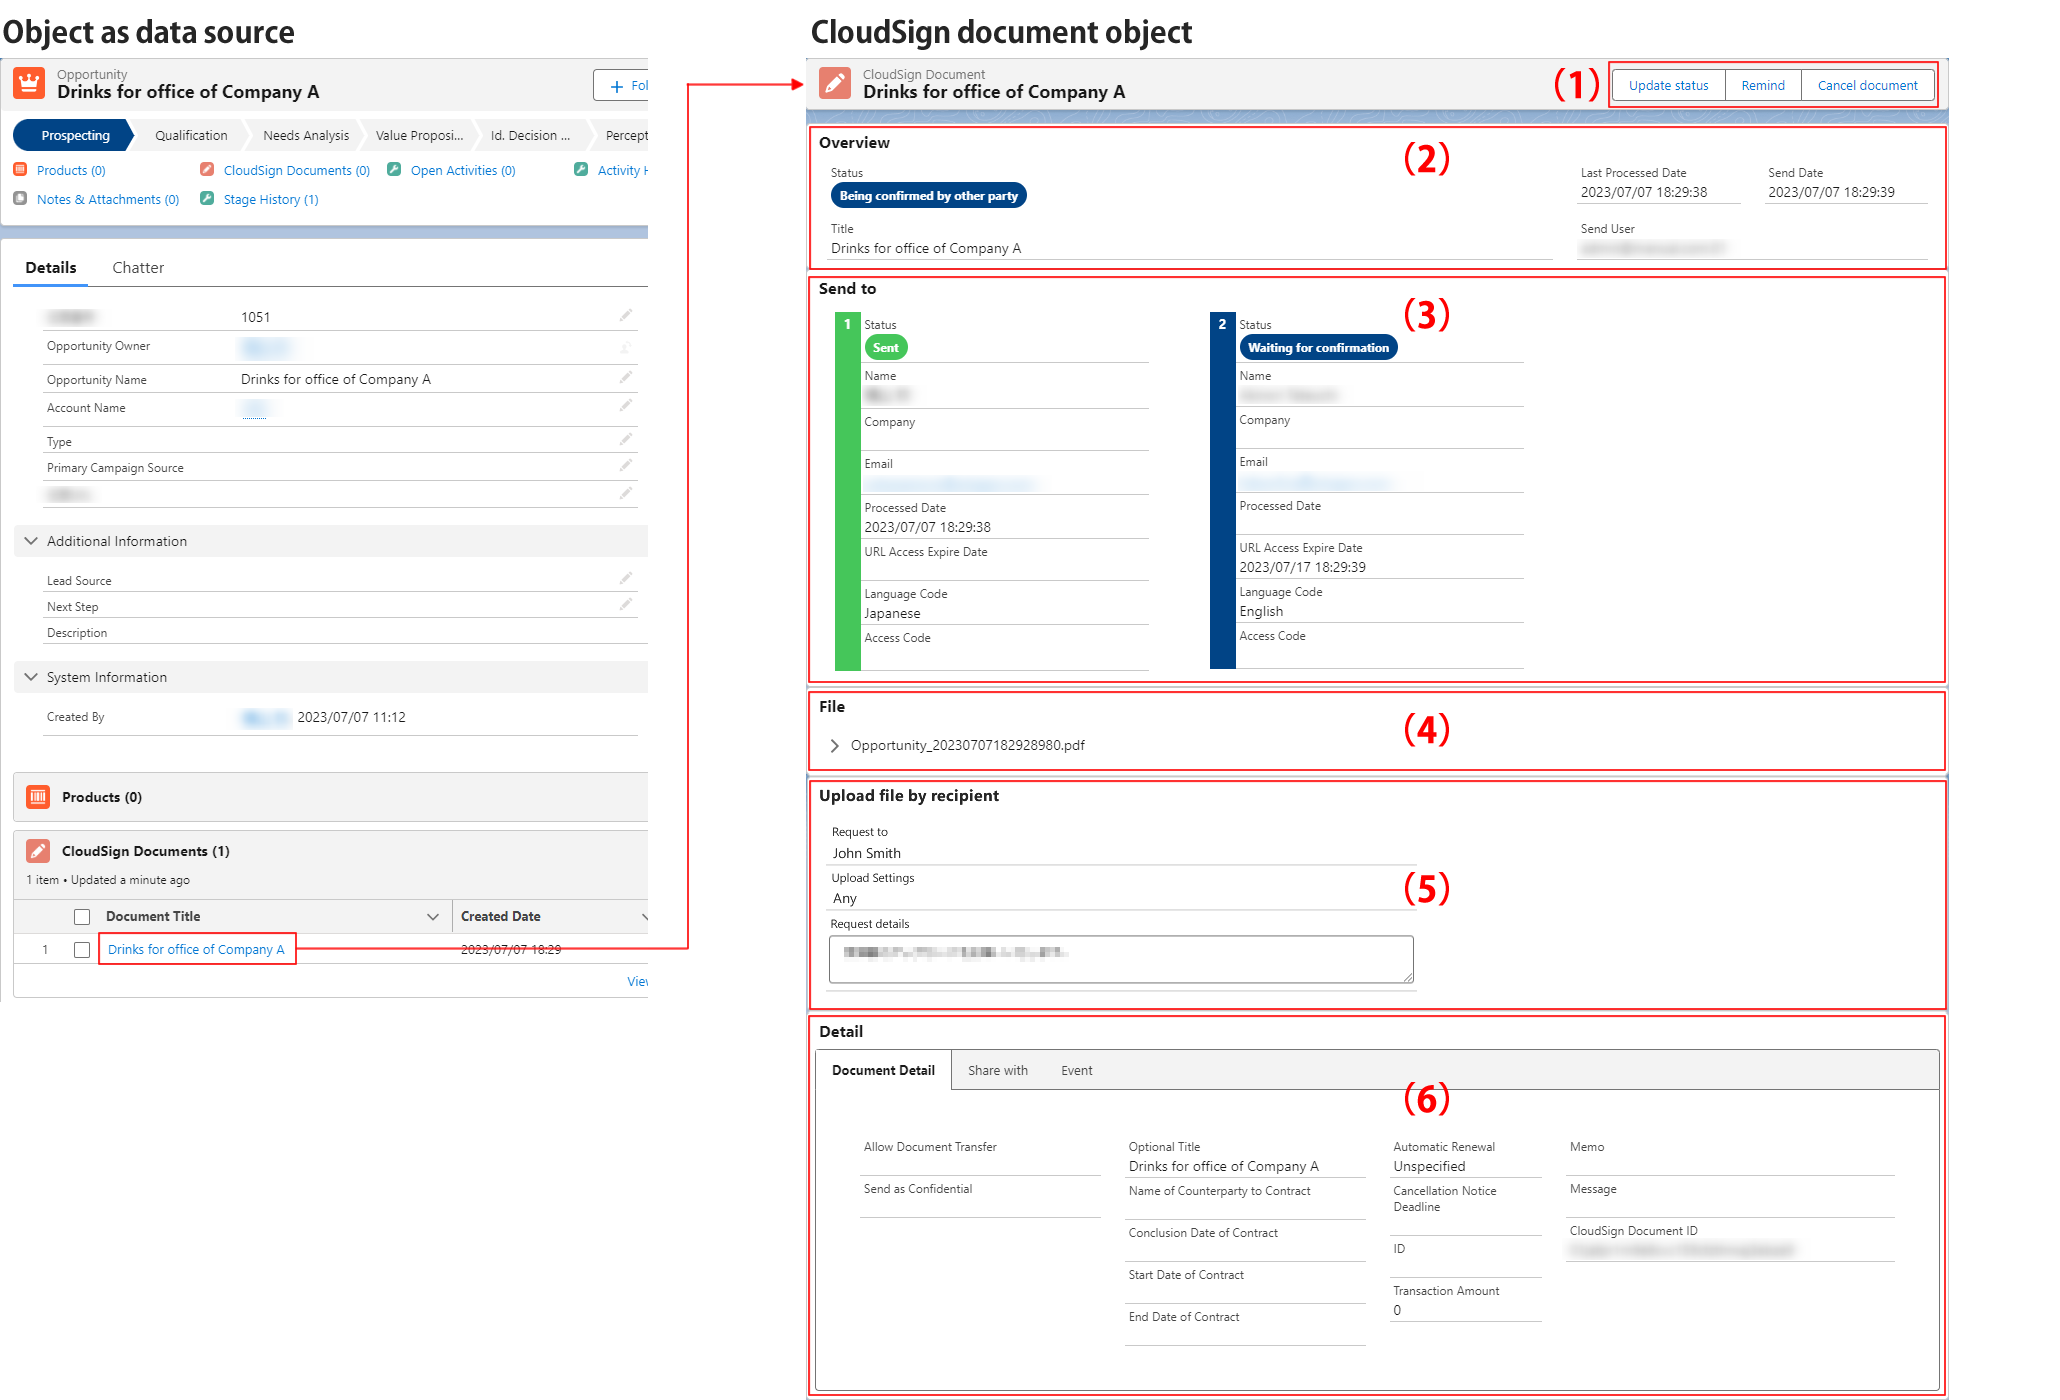
The record details page displays the following information.
No. | Category | Displayed details |
|---|---|---|
(1) | Button |
|
(2) | Overview | Shows document information. |
(3) | Send to | Shows the status and information for each recipient. |
(4) | File | Shows information about the PDF file of the document and the input fields. Click Once the document is signed in CloudSign, it will be overwritten with the concluded contract information and the PDF file. |
(5) | Upload Recipient File | If you have requested an upload from the recipient, the request information will be displayed. If the file has been uploaded, click  |
(6) | Detail |
|
