Resize tables with operations similar to spreadsheet software (Table recognition)
With table recognition, you can adjust the width and height of tables and subforms as you operate spreadsheet cells.
Procedure
To switch the display for table recognition
Select Edit - Table recognition.
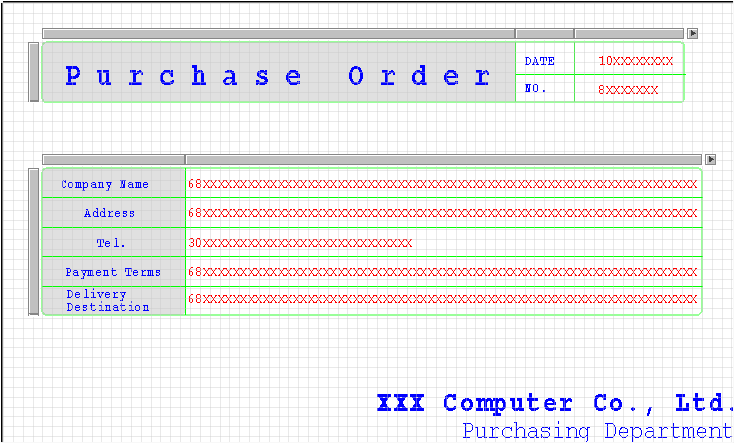
Tables and subforms created using rectangles and straight lines are recognized as tables, and cell size adjustment bars appear at the top and left side of each area.
Restriction
You cannot edit other items in the table recognition mode.
To change the width and height individually using table recognition
Move the mouse pointer over the adjustment bar.
When the mouse pointer changes to
 , drag the mouse pointer in the desired direction (up/down or right/left).
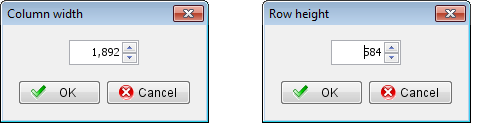
If you want to specify the exact width and height with numeric values, select Resize from the menu that appears when you right-click the corresponding adjustment bar.
Type the desired numeric value (dot) in the Column width dialog or the Row height dialog that appears, and click the OK button.
To change the width and height at once using table recognition
Select multiple consecutive rows or columns while pressing SHIFT.
The selected cells are highlighted in black.
Move the mouse pointer over the adjustment bar.
When the mouse pointer changes to
, drag the mouse pointer in the desired direction (up/down or right/left).Alternatively, select Resize from the right-click menu.
Type the desired numeric value in the Column width dialog or the Row height dialog that appears, and click the OK button.
To add/delete a row or column
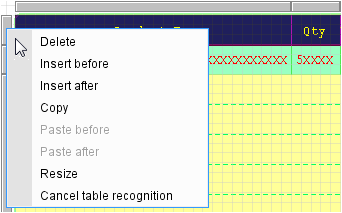
Click the adjustment bar of the corresponding row or column.
The target row or column is selected.
Select the appropriate action from the right-click menu.
Item
Description
Delete
Deletes the selected row or column.
Insert before
In the case of rows, a row is added above the selected row.
In the case of columns, a column is added to the left of the selected column.
The size of the table increases with the addition of the row/column.
Insert after
In the case of rows, a row is added below the selected row.
In the case of columns, a column is added to the right of the selected column.
The size of the table increases with the addition of the row/column.
To copy a row and column
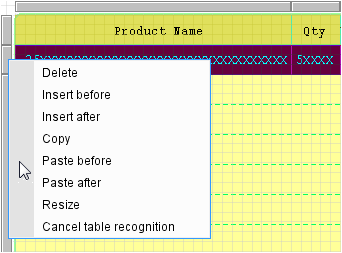
Click the adjustment bar of the corresponding row or column.
The target row or column is selected.
Select Copy from the right-click menu.
The cells to be copied are highlighted in yellow.
Click the adjustment bar of the destination row or column, and select the appropriate action from the right-click menu.
If you paste a row or a column, the items in the cells are also copied.
Item
Description
Paste before
In the case of rows, a row is inserted above the selected row, and the items are pasted in that row.
In the case of columns, a column is inserted to the left of the selected row, and the items are pasted in that column.
The size of the table increases with the addition of the row/column.
Paste after
In the case of rows, a row is inserted below the selected row, and the items are pasted in that row.
In the case of columns, a column is inserted to the right of the selected row, and the items are pasted in that column.
The size of the table increases with the addition of the row/column.
To cancel table recognition
Select Edit - Cancel table recognition mode.
Alternatively, click an adjustment bar and select Cancel table recognition from the right-click menu.
Table recognition mode will be disabled.