4-8-3 Set chart properties
You can set the following items with the Properties Editor for charts:
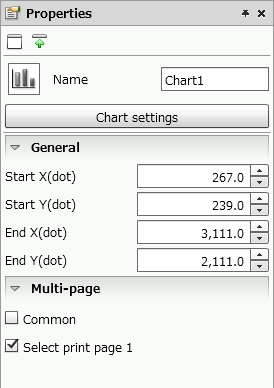
Common settings
Item | Description |
|---|---|
Name | Type a chart name. If you do not specify a name, it is automatically and sequentially specified from "Chart1". You can use alphanumeric characters, Kana, Kanji, and underscores (_). The chart name can be up to 30 bytes in length. Do not use a number for the first character of the name. |
Chart settings
Item | Description |
|---|---|
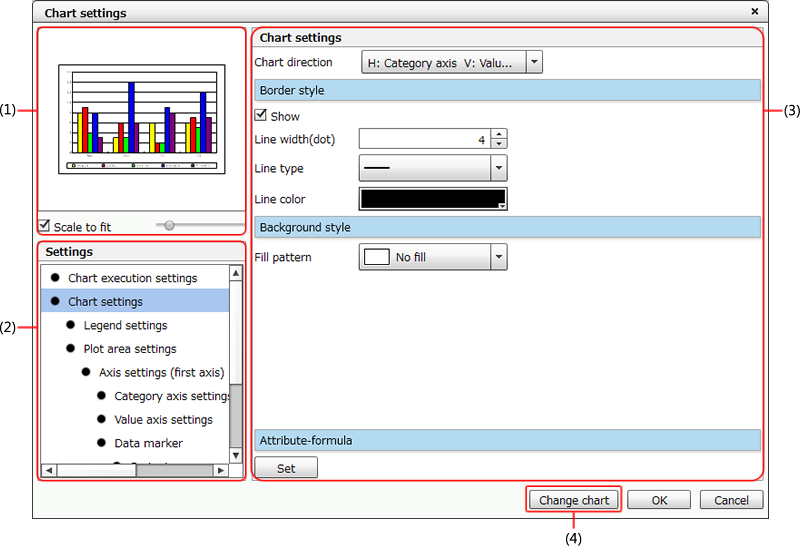
Chart settings | When you click this, the Chart settings dialog is displayed. For an overview of this dialog, see "Layout of the "Chart settings" dialog". |
General
Item | Description |
|---|---|
Start X(dot) | Specify the X coordinate of the upper left corner of the chart area. You can also change the value by clicking the |
Start Y(dot) | Specify the Y coordinate of the upper left corner of the chart area. You can also change the value by clicking the |
End X(dot) | Specify the X coordinate of the lower right corner of the chart area. You can also change the value by clicking the |
End Y(dot) | Specify the Y coordinate of the lower right corner of the chart area. You can also change the value by clicking the |

Multi-page
Item | Description |
|---|---|
Common | Specify whether to place the chart on the Common page. Select the check box to place the item on the Common page. The chart is shared on all multi-pages and you will be able to edit it from any multi-page. In addition, the line will be printed on all output pages. |
Select print page n ("n" is any number) | If you clear the Common check box, the settings for specifying the target multi-pages will appear. Select the check box of the multi-page where you want to print the chart. |
Layout of the "Chart settings" dialog
Set the created chart in the Chart settings dialog.
Item | Description |
|---|---|
(1) Preview | A preview of the created chart appears. If you clear the check box for Scale to fit, you can zoom the preview in and out by using the slider on the right. ReferenceIf you change settings in the advanced settings area (3), the preview reflects the change in real time. To apply changes to the chart on the Form Editor, click the OK button. |
(2) Settings | Select an item to set. Some options differ between rectangular and circular charts. |
(3) Advanced settings | Set details of the item selected in Settings. For details on how to set, see "4-8-5 Change chart area settings" and subsequent sections. |
(4) Change chart | To change the type of the chart, click this button to open the Change chart dialog. The procedure is the same as Create new chart dialog in "4-8-2 Create a new chart". 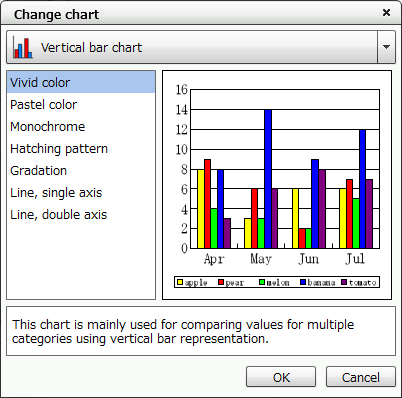 CautionIf you change the type of the chart, all settings other than Chart execution settings are initialized. |