4-5-8 Arrange items to be overlapped - operations on the "Layer" window
When you place items by overlapping them, their appearance differs depending on the overlap order.
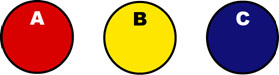
Three circles – A, B, and C
For example, three overlapping circles, A, B, and C, appear differently depending on whether they overlap in the order of A, B, C, or in the order of C, B, A.

When overlapping in the order of A, B, C / When overlapping in the order of C, B, A
Use the layer feature
Items overlap in the order they are placed in the Form Editor. You can change the overlap order of items using the layer feature.
To perform layer operations, click the  Layer button on the left toolbar to open the Layer window.
Layer window
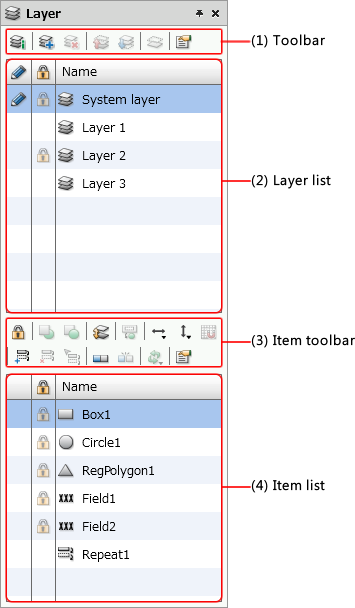
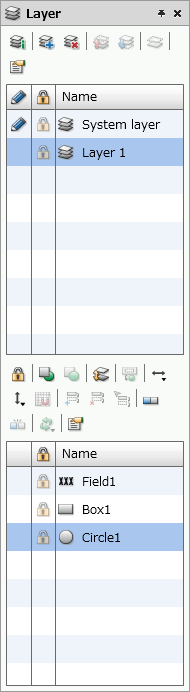
"Layer" window
Item | Description | ||||||||||||||||
|---|---|---|---|---|---|---|---|---|---|---|---|---|---|---|---|---|---|
(1) Toolbar  | Perform other layer operations such as adding, deleting and combining layers.
| ||||||||||||||||
(2) Layer list 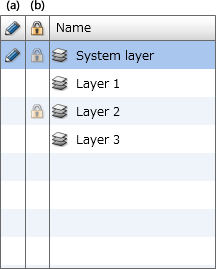 | The layers are displayed in list format.
| ||||||||||||||||
(3) Item toolbar | A toolbar for operating items. It has the same features as the toolbar in the Items window. For details, see "4-5 Basic operations of items". | ||||||||||||||||
(4) Item list | Items placed on the selected layer are displayed in list format. |


Restriction
The "Layer feature" is available only with printers that support graphic mode.
If there are no items on the new layer, the layer is disabled.
When using an embedded form, if an item in a child form is linked to a disabled new layer in a parent form, a "-30" error occurs when printing.
If all items are placed on the default layer in a form that does not contain items in graphic mode, the "layer" feature will be disabled.
When items are set to the basic mode, there is no guarantee that items in the same layer will be output in the order in which you set them.
You cannot move different types of items within the System layer.
Items must be placed on each multi-page to change the overlap order using the "Layer feature". When items are placed on the Common page, some items cannot be controlled as they are added on the form overlay.
You cannot place repeat items, sub forms, records, and formcopies on the layer other than the System layer.
Layer overlap order
Layers are provided for each item in the Layer window. The window initially shows only the System layer, but when you click the  Show details button, the layer in each item is shown as a list of layers.
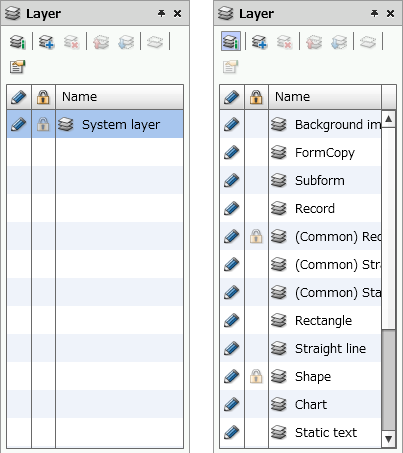
Display in the "Layer" window Initial state (left) and layer display state for each item (right)
Reference
The default layer for each item (see the expanded view on the right in the above figure) is called the System layer.
A layer is added to the bottom of the layer list by clicking the  Add layer button.
As for the order of overlap between layers, Background image, which can be confirmed in the layer display state of each item, is placed at the back, and a layer that is displayed below the Background image will be displayed on it.
Added layers are placed at the bottom (front) of the layer list, and are displayed on top of all the displayed System layer.
Item overlap order
Items placed in the Form Editor are placed in the System layer in the order of creation.
The most recently drawn item appears on top.
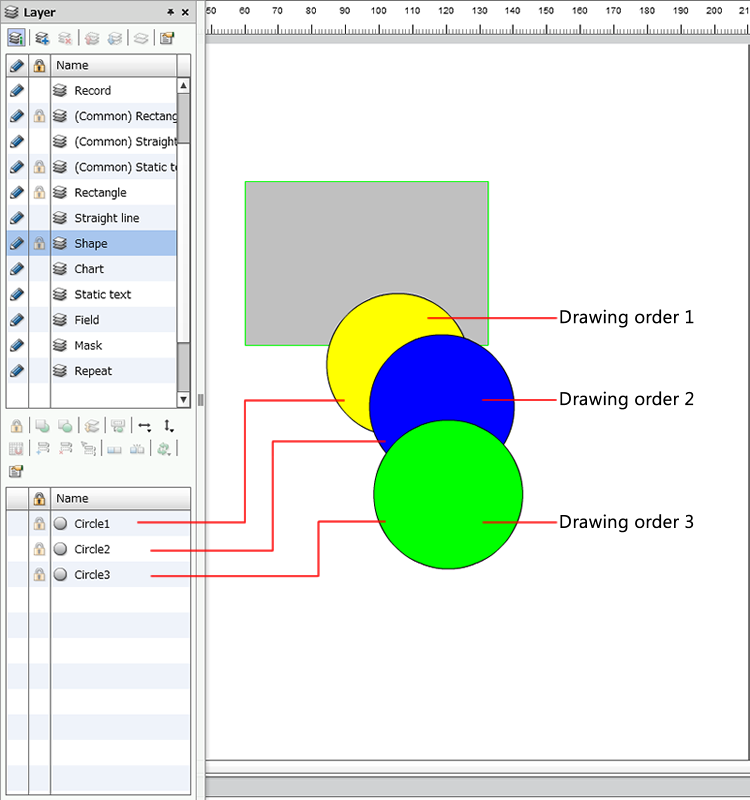
The item at the top of the tree is placed at the back
Restriction
When printing out characters or shapes, for items that are supported by the printer driver, the system uses printer control commands (machine-specific draw commands) to print the items. However, for any items not supported by the printer driver, SVF output engine converts the items to images and then sends them to the printer.
For example, when using proportional fonts, items are not output using the fonts installed in a printer. Instead, the SVF output engine converts those fonts to images and sends them to the printer.
Example: when trying to print some static text reading "abcde" on a color-filled rectangle

Because the static text part is converted into an image, the margins are displayed in white without becoming transparent.

The margins are transparent in PDF and EMF. Confirm the actual output result when outputting overlapping items with printer models that support graphic modes other than PDF and EMF.
Change the item overlap order
When you change the overlap order of items, the operation method differs depending on whether you change between items of the same type or between different types of items.
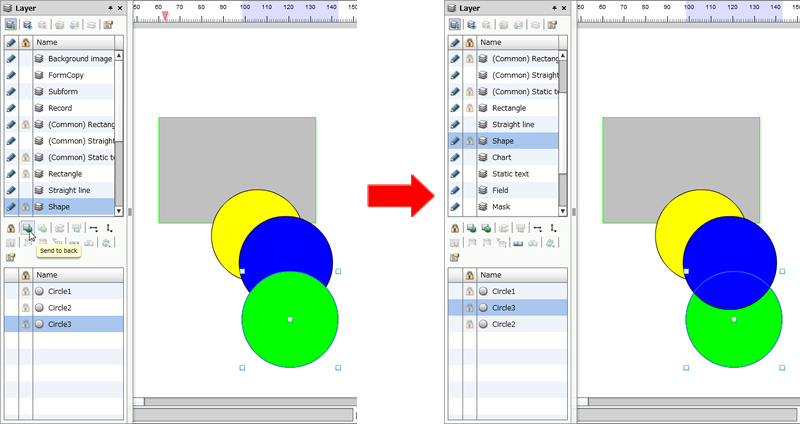
Change the overlap order of items of the same type
Change the overlap order of items of the same type as follows:
From the item list, select the item to change the overlap order.
Click the
 Send to back button or the
  Bring to front button in the Layer window so that they are displayed in the desired order in the item list.
The overlap order of the selected item is changed.
The overlap order is changed
Change the overlap order of items of different types
To change the overlap order of different item types, create a new layer and change the overlap order in that layer.
Click the
Add layer button in the Layer window.A new layer will be added.
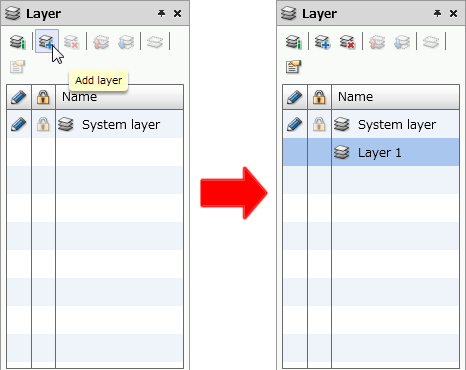
Add a new layer
Select an item in the item list of the Layer window and click the
 Move to another layer button.
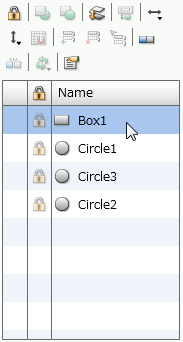
Select an item to move to another layer
In the Move to another layer dialog, select the layer in movement destination and click the OK button.
The selected item moves to Layer 1.
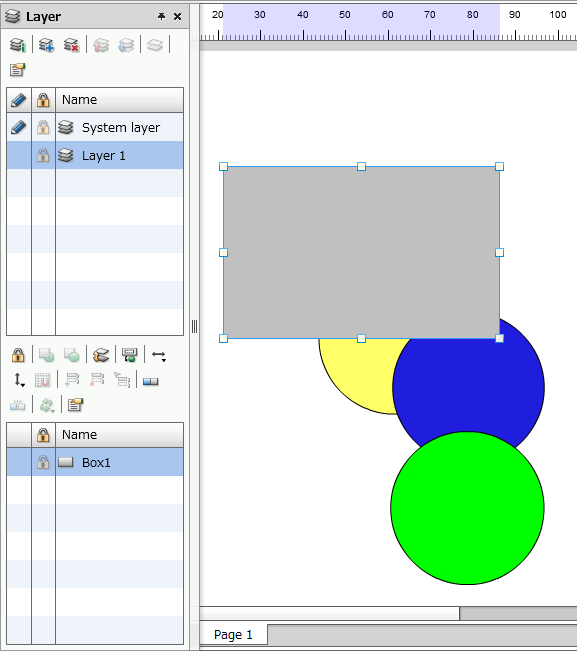
The item moved to "Layer 1"
Switch show/hide every layers
You can show or hide every layers. If you hide a layer, all the items included in that layer are also hidden.
Use the following procedure to show or hide every layers:
Select a layer from the layer list and click the
 Properties button to display the Layer information dialog.
When "System layer" is selected
When you select the System layer, you can show or hide each item.
Select the check box for items to show, and clear the check box for items to hide.
When other than "System layer" is selected
Check the Show layer checkbox to display, and clear the Show layer checkbox to hide.
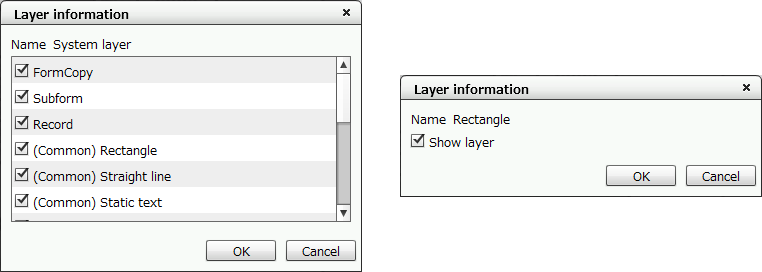
When "System layer" is selected (left) and when other layers are selected (right)
Click the OK button to close the Layer information dialog.
To cancel the changes, click the Cancel button.
Enable/disable to edit every layers
For items placed in the Form Editor, you can switch whether editing is possible for each layer.
To disable editing of a specific layer, perform the following procedure:
Click the
Show details button of the Layer window.In the layer list, click
 of the layer to disable editing.
 Editable state
 Disable editing state
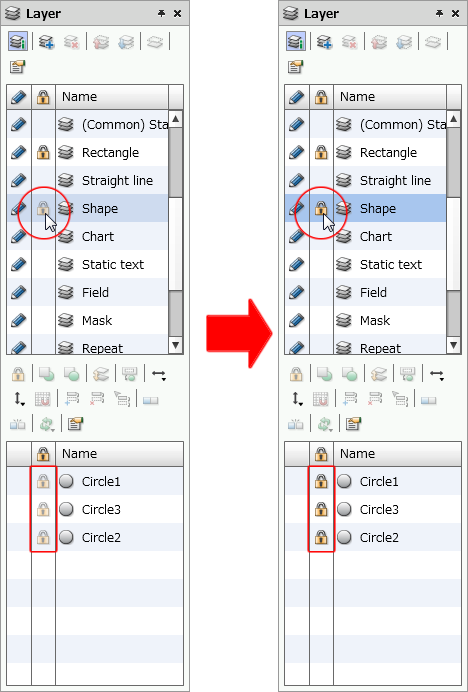
Click
on the layer where items are located (left) to disable editing (right)Items in the disable editing layer can no longer be edited from the Form Editor and property editor.
Reference
When you click
of a locked layer or item, it is unlocked and you can edit again from the Form Editor or Property editor.The lock settings information of items is stored in the XML form file.
Enable and disable editing of System layer
You can collectively enable or disable editing of all layers other than user-created layers in the Form Editor. You can place new items on layers even if you have disabled editing.
To disable editing of all layers are as follows:
Click
of System layer in the layer list of the Layer window.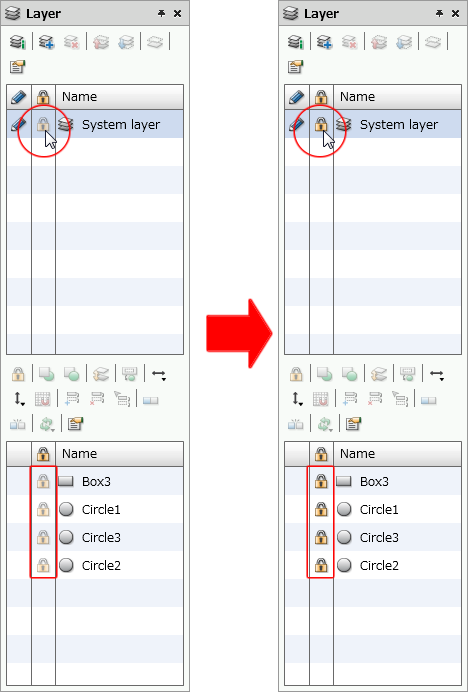
Click
for "System layer" (left) to disable editing (right) is displayed in all item names and all items cannot be edited from the Form Editor and property editor.
Reference
To unlock System layer, click of System layer.
All items will be editable.
Combine multiple added layers into one layer
You can combine multiple added layers into one layer.
To combine layers, select the source layer and click the  Combine with another layer button.
Items in the source layer move to the destination layer and the source layer is deleted.
The position of items in a combined layer is as follows:
Combine "Layer 2" with "Layer 1"
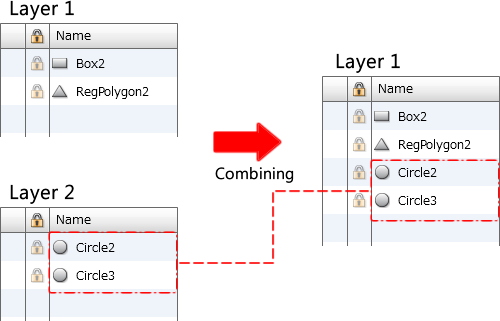
Before combining (left) and after combining (right)
Combine "Layer 1" with "Layer 2"
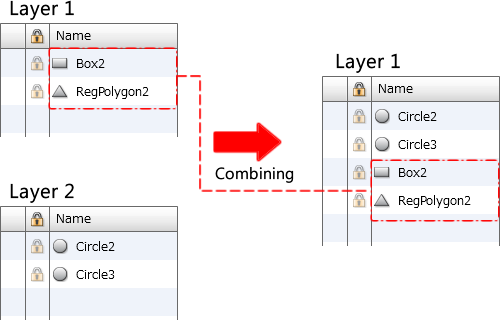
Before combining (left) and after combining (right)
Add a PDF layer
Form editor has a feature to create PDF layers (PDF layer is a layer feature added from Adobe Reader 6.0).
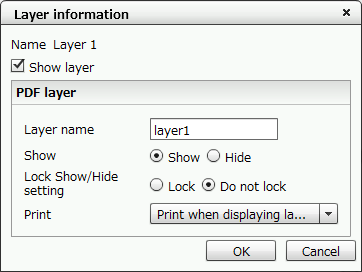
The PDF layer has four features: Layer name, Show, Lock Show/Hide setting, and Print.
Use the following procedure to set a PDF layer:
Create a new layer and place items on that layer.
Create a new layer and place items on it
Select the PDF layer check box in the Property editor for the paper.
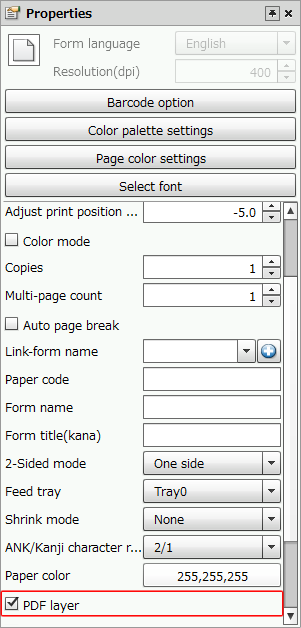
Select the "PDF layer" check box in the Property editor for the paper
Click the
Properties button of the Layer window.Configure the various settings of PDF layer in the Layer information dialog.
Item
Description
Layer name
Specify the layer name displayed in the layer panel of Adobe Reader.
Caution
You cannot specify duplicate PDF layer names.
Show
Specify the display state of the corresponding layer when opening a PDF file using Adobe Reader. This does not affect printing.
Show
Opens the PDF file with the corresponding layer shown.
Hide
Opens the PDF file with the corresponding layer hidden.
Lock Show/Hide setting
Specify the lock show/hide setting of the corresponding layer in Adobe Reader.
Lock
The display setting for the corresponding layer cannot be changed.
Do not lock
The display setting for the corresponding layer can be changed.
Print
Set the printing state of layers when printing from Adobe Reader.
Print when displaying layer
Prints the corresponding layer when the corresponding layer is shown.
Never print
Does not print the corresponding layer regardless of its display setting.
Always print
Prints the corresponding layer regardless of its display setting.
Click the OK button to close the Layer information dialog.
Caution
"PDF layer setting" must be set to "Enable" of the property of PDF model printer in the SVF Configuration Tool.
If you set PDF layer setting to Enable in the PDF printer properties in SVF configuration and print an XML form file with the PDF layer check box cleared in the paper properties, a layer named "nothing" is created.