SVF Cloud for ServiceNow
Here, we describe the procedure for creating a Word form layout, using an example of outputting data from the "incident" table on ServiceNow to a Word file ("List of failures") which is already in use.
An overview of the example is as follows.
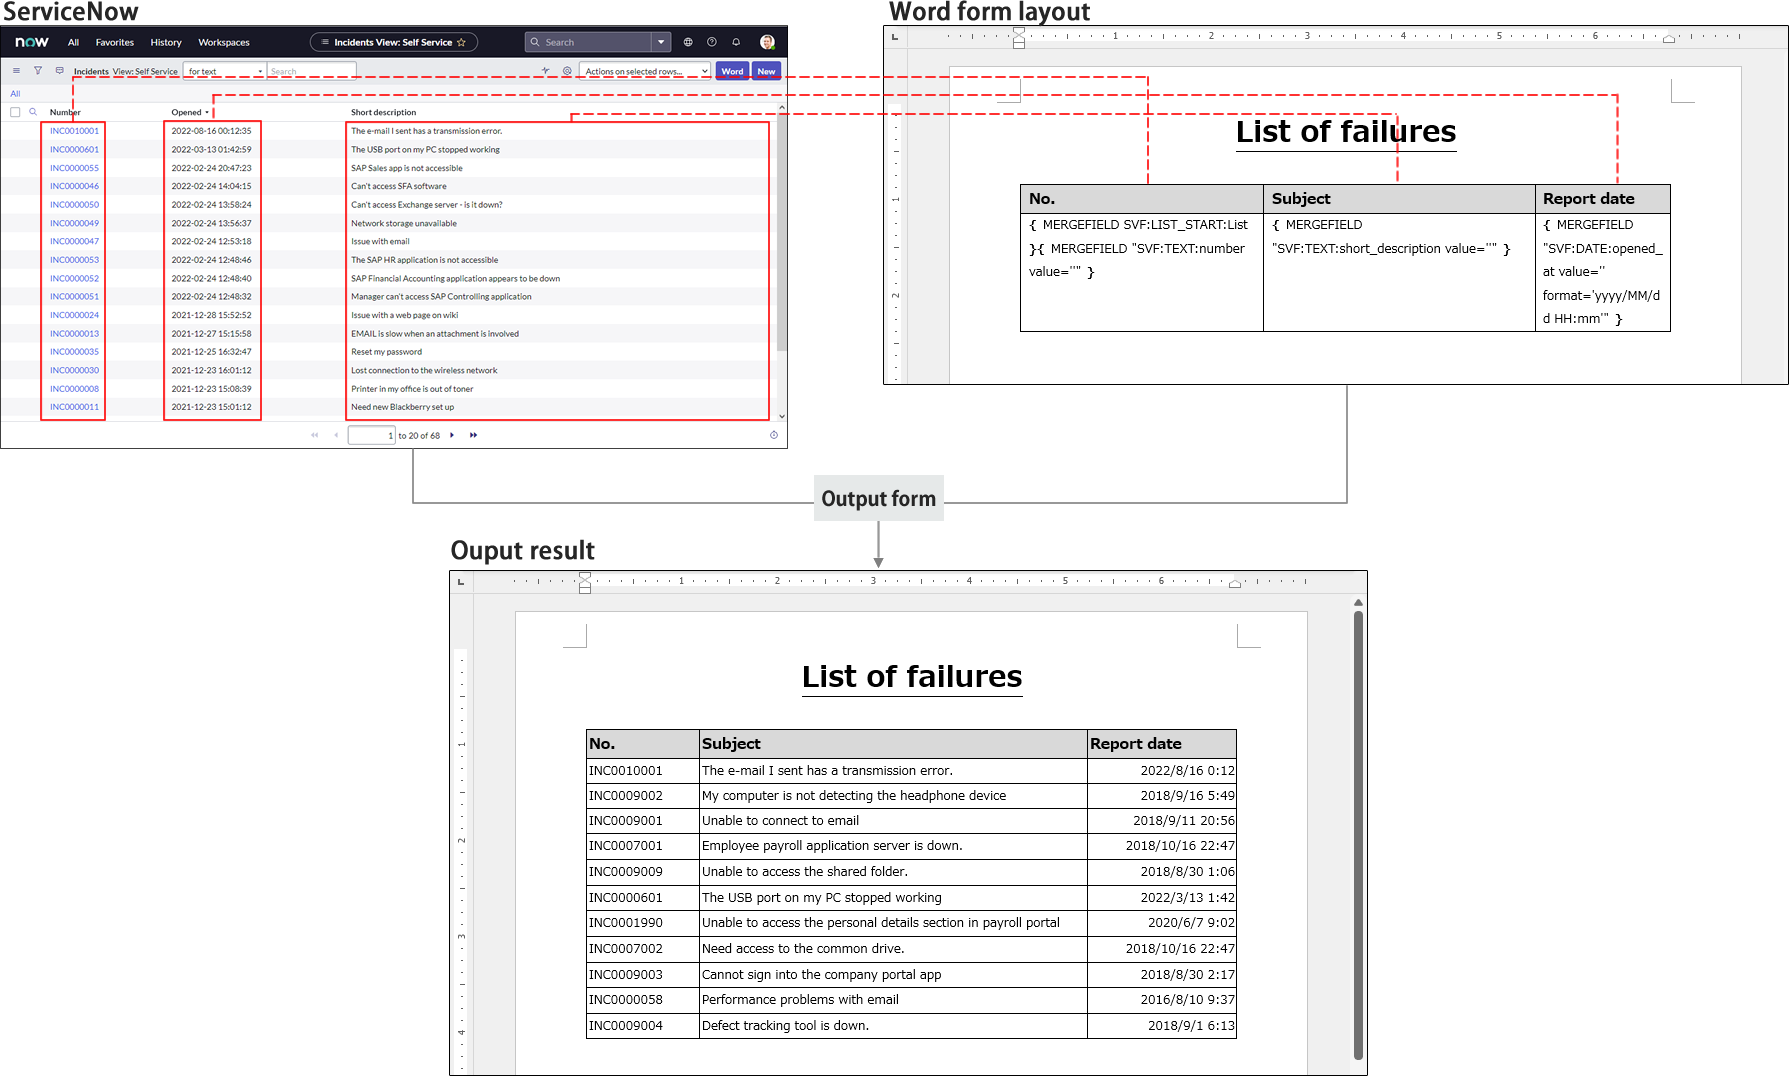
ServiceNow data
It is assumed that multiple incidents are registered in the "incident" table on ServiceNow.
The incidents include incident numbers, brief descriptions, and other information.
Word file "List of failures"
"Meiryo" is set as the font for the whole document.
Output process for a form that uses a Word form layout
The incidents on the "incident" table are output in one row per incident.
Caution
When diverting a "Word 97-2003 Document (*.doc)" Word file
If you divert a Word file saved as "Word 97-2003 Document (*.doc)" to a form layout, clear the Maintain compatibility with previous versions of Word checkbox and save. If this checkbox is selected, the mode is "Compatibility Mode", and the form layout will not be supported.
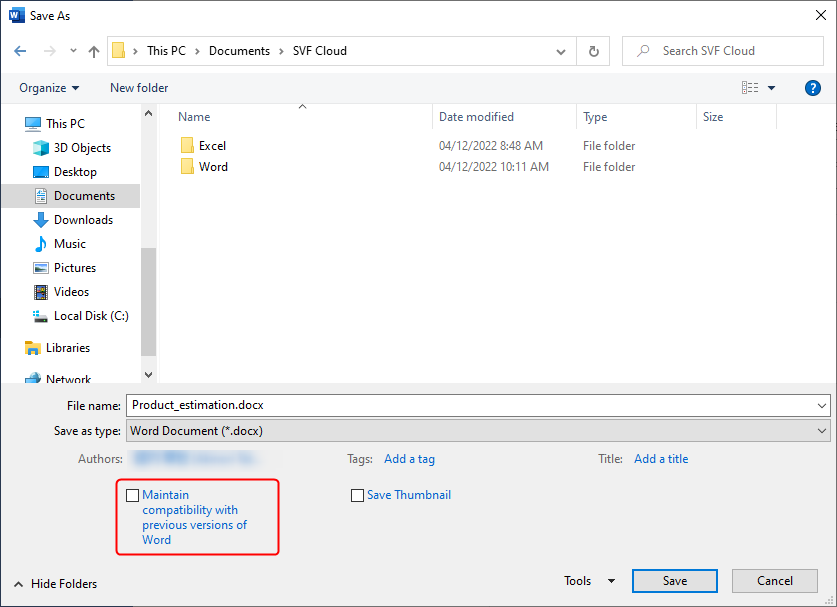 |
Also, even when you deselect the Maintain compatibility with previous versions of Word checkbox and save, the form layout will start in "Compatibility Mode" automatically if you open it in a later version of Microsoft Word (for example, using Word 2016 to open the Word file (.docx) saved in Word 2007).
In such cases, clear the Maintain compatibility with previous versions of Word checkbox again, and then save.
Create a list
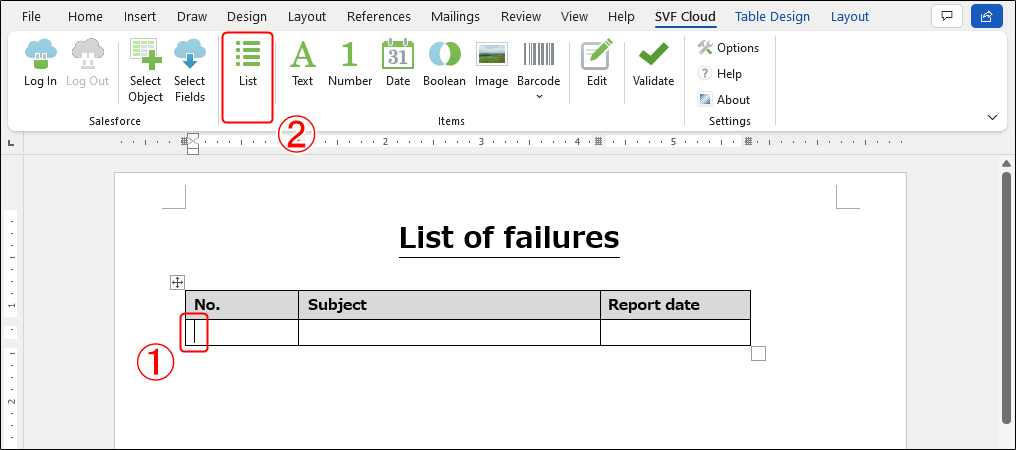
Create a list to output details.
In order to create a list, you need to create a table with the Word features.
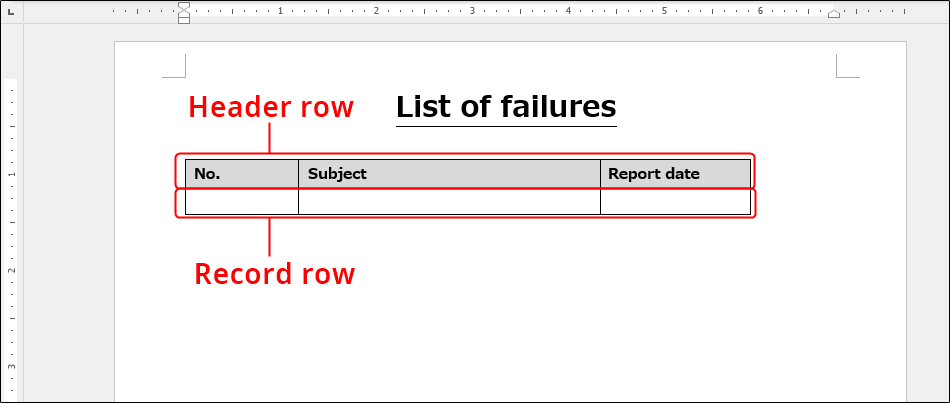
Here, use a table created in advance that has one header row and one record row.
 |
 |
|
Place a field
Place a field to the position where data will be output.
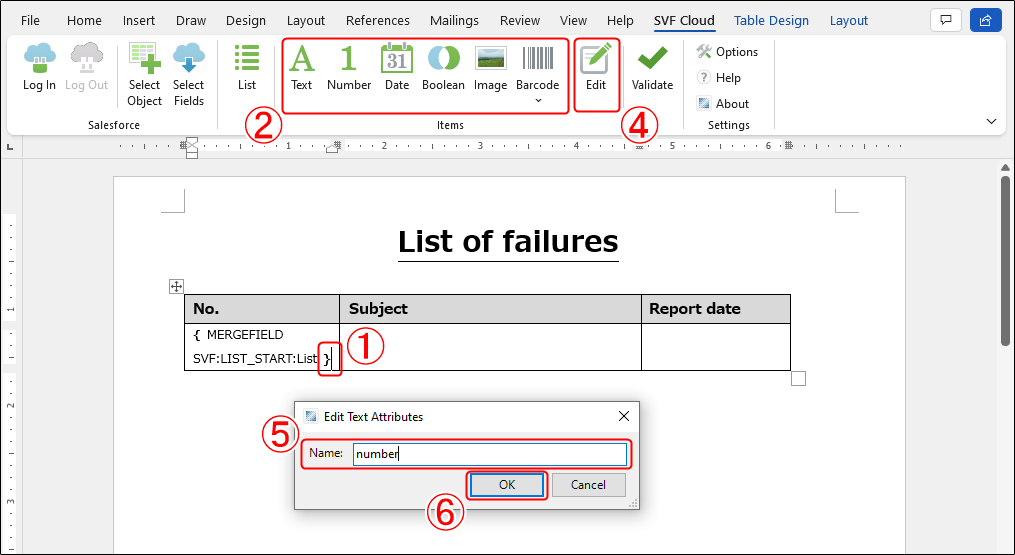
Move the cursor to the position where data will be output.
Here, we want to insert a text field into a cell that already has a list field, so the cursor is moved after the list field.
To insert a field, click the button for the type of data to output (in this case, the Text button).
Reference
If you have selected an existing field, the tag will be overwritten. Note that common tags (name attribute, and the like) are retained before and after overwriting.
Click the inserted field to select it.
To edit the tag in the field, click the Edit button.
Specify a value for an attribute. The attributes that can be specified depend on the field type.
Name (name attribute) is a required attribute. The value specified here will be the field name.
Click the OK button to close the dialog box.
Validate tag descriptions
Checks if there is an error as a form layout in the file.
If there are multiple fields with the same name, or if the tag format is incorrect, it will be reported as an error.
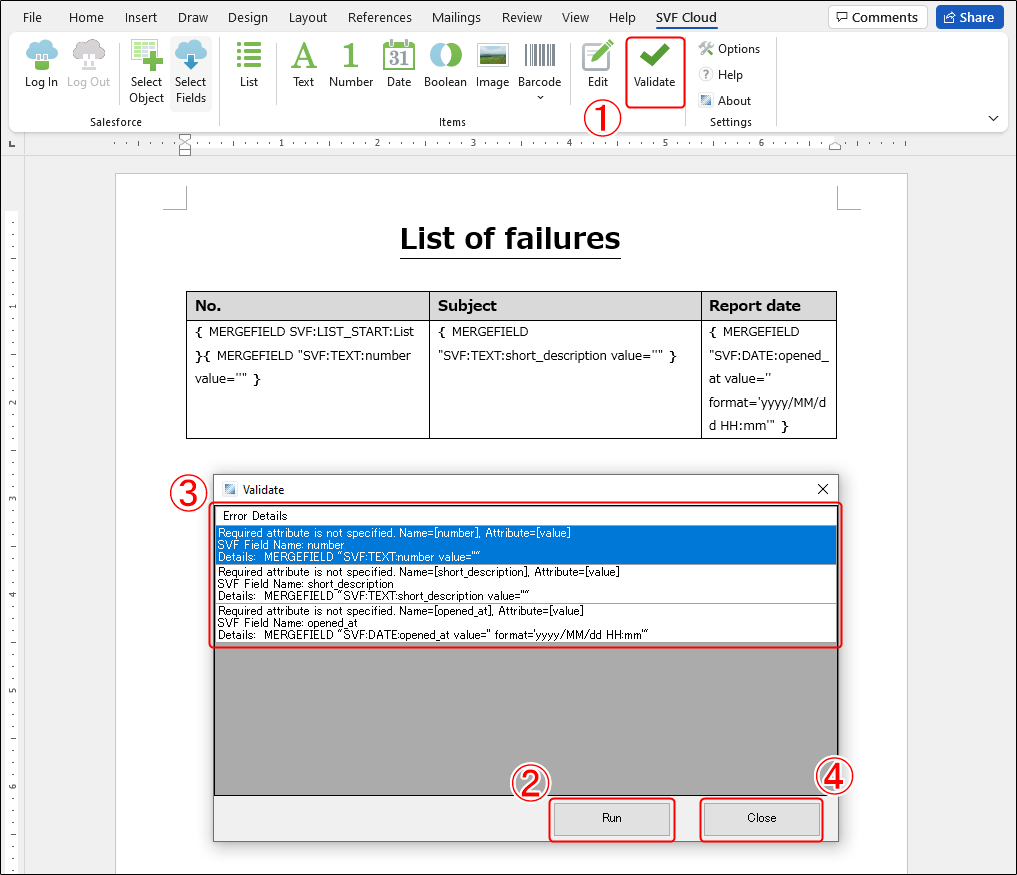
Click the Validate button.
The Validate dialog box is displayed.
To perform validation, click the Run button.
If an error is found, the tag in question and the error details are displayed.
If no error is found, nothing will be displayed in the dialog. Proceed to step 4.
Reference
You can safely ignore the error caused by not specifying a value attribute (because SVF Cloud for ServiceNow does not use a value attribute).
Correct the tag, and so on according to the error details.
Click the Close button to close the dialog box.
Upload a Form Layout
Upload the created form layout from SVF Cloud Manager. For details on how to upload, see "Create a form layout in Microsoft Word" in "SVF Cloud Administration Guide" for SVF Cloud Manager.