Operate items for each multi-page
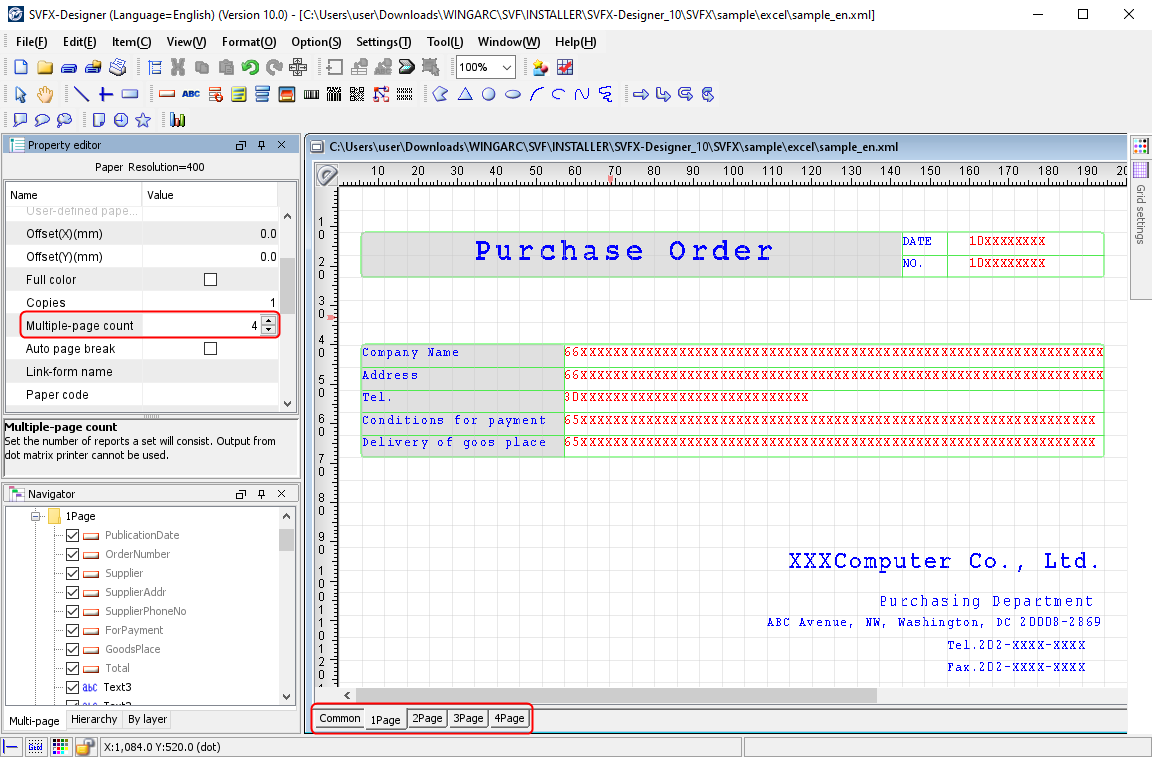
Tabs appear at the bottom of the form window for the number of pages specified in Multiple-page count in the paper properties. If the Common page is selected, you can place items common to all multi-pages. On the pages other than Common, you can place items specific to each page in addition to those created on the Common page.
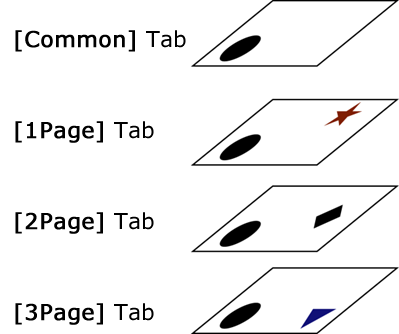
As shown in the following example, placing a black circle on the Common page will also place a black circle on each multi-page. Figures placed on each page from "1Page" to "3Page" are not placed on other pages.
You can check which items are designed for which multi-page in the Multi-page tab on Navigator.
This section describes how to view the Multi-page tab on Navigator and how to operate items for each multi-page in the Multi-page tab on Navigator.
View of the" Multi-page" tab in "Navigator"
On the Multi-page tab, the status of the items placed on the form window appears in a tree format. Each tree corresponds to each multi-page. This tree is called as "Page tree".
Items appear under each page tree, regardless of the pages where the items are placed. In the page tree, you can find the pages where items are designed by looking at the check boxes placed before item names and display color of those items.
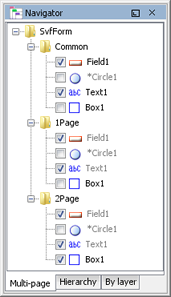
Check boxes placed before item names
You can check the page on which each item is placed.
The items will be selected on the page tree of the corresponding page.
As the items placed on the Common page are also placed on each page by default, the corresponding items on all page trees will be selected.
Items that are not selected on any multi-page will have "*" before their names.
Display of item names
If the names of items other than subforms, records, formcopies, and masks are grayed out on each multi-page, it indicates that the check boxes on the corresponding multi-pages are not available for these items.
For items selected on the "Common" page
The item names are displayed in black on the Common page and in gray on each multi-page.
Regardless of whether check marks appear on each multi-page or not, items are placed on all pages.
For items not selected on the "Common" page
If an item name appears in black, the item is placed on a multi-page with its check box selected. You can change the placement status of the item on each multi-page by selecting or clearing the check box.
Reference
Subforms, records, and formcopies are treated as Common page items. Therefore, these items are placed on all multi-pages. Since they are the items you cannot set for each multi-page, they are selected on the Common page on the page tree. Their names are grayed out for the other pages.
You cannot place masks on the Common page. Masks are not selected on the Common page on the page tree. You can place masks on each multi-page only.
Procedure
To select an item editable on each page
Check items that are selected in the page tree.
Items that are selected can be edited on each page tab of the form window. Items that are not selected do not appear in the form window.
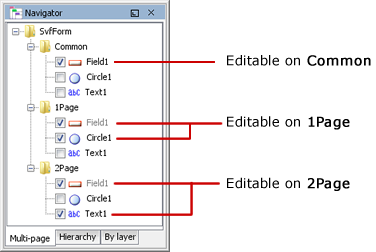
Select an item with its check box selected in the page tree.
The target item is selected and displayed in the form window.
To enable editing of an item on a different page
In the page tree, select the item you want to make editable.
An item placed on a different page is also placed on the selected page and can be edited. The edited contents are reflected on all pages sharing the edited items.
Example of operation
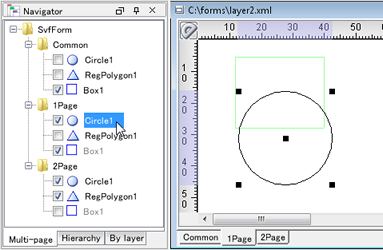
Example of selecting an item from the page tree
Assume that the Common page is currently displayed.
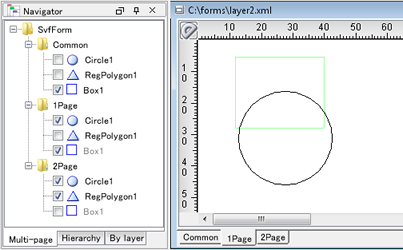
If you click the circle for "1Page" on the page tree, the circle on "1Page" is selected and displayed in the form window.
Example of enabling editing of an item on different page
Assume that a rectangle is placed on the Common page, a circle is placed on "1Page", and a triangle is placed on "2Page".
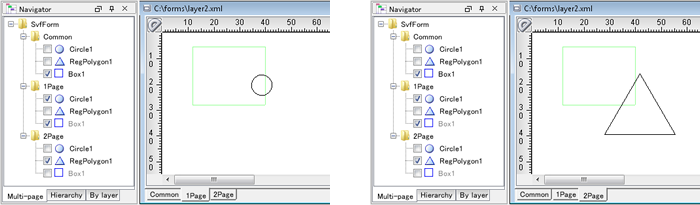
If you select the circle under "2Page" in the page tree, the circle appears on "2Page" and you can edit it. In this example, the circle is enlarged.
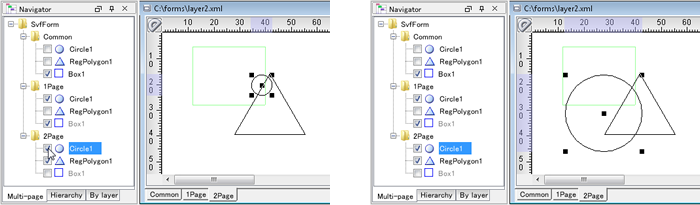
Changes are also reflected on "1Page" where the circle is placed.