4-6-9 Create output area for variable data (Subform)
Some forms, such as line items in sales ledgers, subtotals, totals, have variable types such as rows that are inserted as needed and printing positions are different. In order to create such a form, create "Subform" as an area where different data can be output to different rows and distinguishes from normal forms. In addition, it is necessary to create "Records" in the subform, which serve as the output area for the data.

Example of variable type form
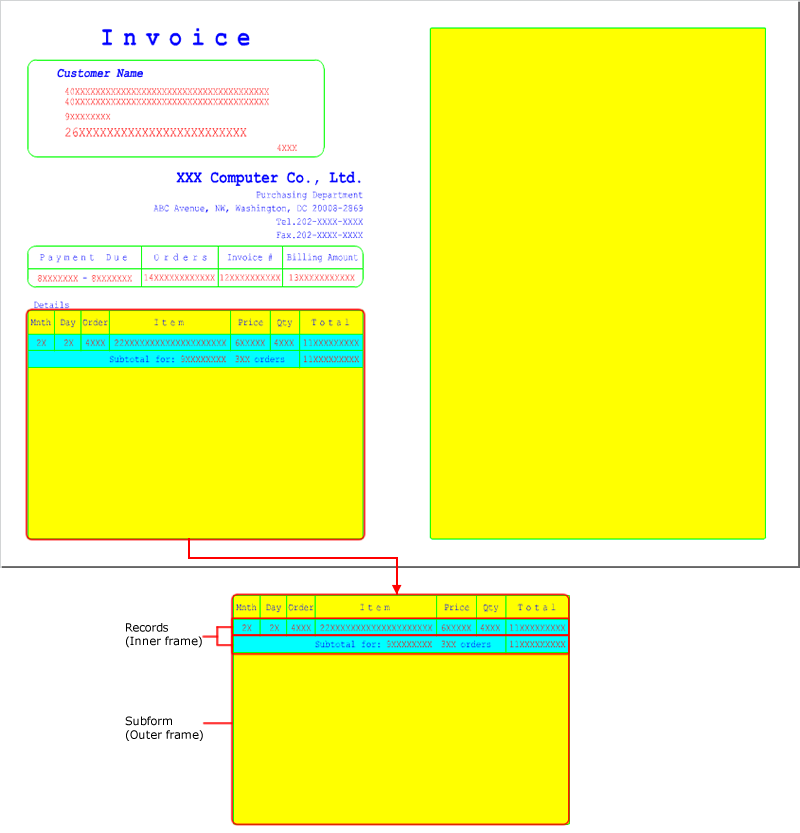
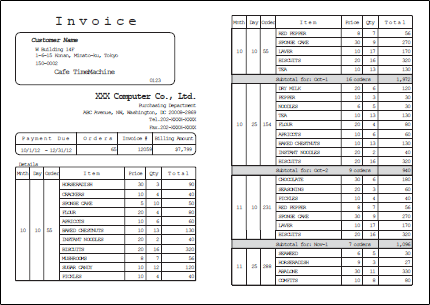
Example of subforms and records
Caution
You can create multiple subforms in one form, but you cannot control multiple subforms that are not linked. Only one subform can contain records in an XML form file.
You cannot create the following items in a layer directly under a subform:
Field, image, barcode, 2D barcode
Any item set an attribute-formula
If necessary, create a link-subform as the output destination for printed records that exceed the area available on the subform.
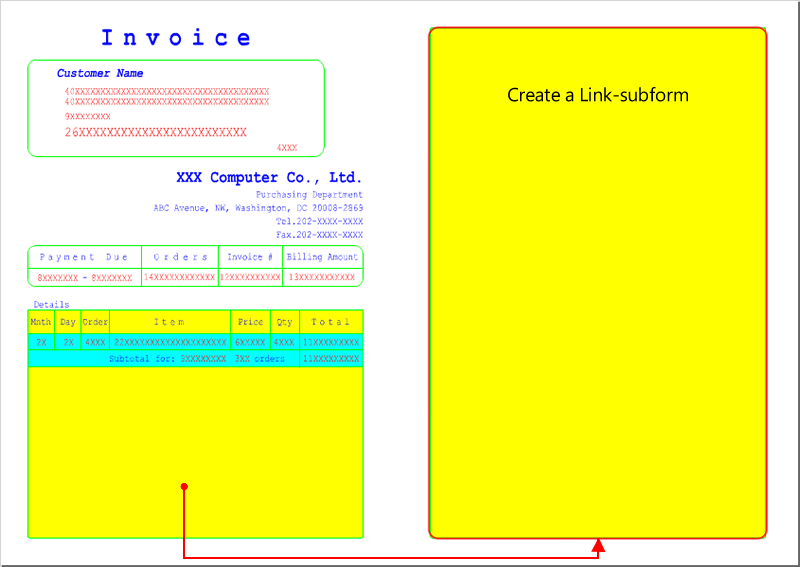
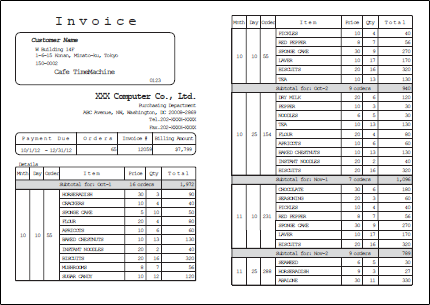
Records that exceed the subform are output to a link-subform
Place a subform
Use the following procedure to place a subform:
Click the
 Create subform button on the toolbox and move the pointer to any point on the Form Editor.
The pointer changes to
 .
.Drag the mouse to make a rectangle on the Form Editor.
A subform is placed.
Set the properties for the placed subform with the Property editor.
Set the subform properties
Set subform properties. Properties are categorized as General, Line, Multi-page.
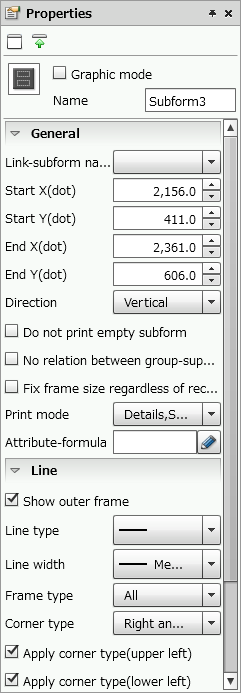
Subform properties
Reference
In the color specification field, you can select the color registered in Color palette settings in the paper Property editor. For details on how to set color palettes, see "4-11-2 Set a color palette".
Subforms are subject to "Fill transparent mode". For details on "Fill transparent mode", see "4-11-3 Change design colors of items".
Common settings
Item | Description |
|---|---|
Graphic mode | Specify whether to enable the graphic features. When the check box is selected, the graphic features are enabled. The Graphic mode items are added to the Property editor and you can make advanced settings. For details on the graphic mode, see "4-2 Basic mode and graphic mode". |
Name | Type a subform name. If a name is not specified, it is automatically specified sequentially starting from "Subform1". You can use alphanumeric characters, Kana, Kanji, and underscores (_). The name can be up to 30 bytes in length. Do not use a number for the first character of the name. |
General
Item | Description |
|---|---|
Link-subform name | If multiple subforms are placed on the form window, you can specify them. If the records printed in a subform exceed the available area, a page break is normally inserted and the remaining data is printed on a new page. However, when a link-subform is set, the remaining data is printed on the specified subform in the same XML form file. For a link-subform, only set its area and do not set records in it. Records from the original subform are automatically inherited. ReferenceIf you change the name of the linked subform, Link-subform name automatically changes accordingly. |
Start X(dot) | Set the X coordinate of the upper left corner of the subform. You can also change the value by clicking the |
Start Y(dot) | Set the Y coordinate of the upper left corner of the subform. You can also change the value by clicking the |
End X(dot) | Set the X coordinate of the lower right corner of the subform. You can also change the value by clicking the |
End Y(dot) | Set the Y coordinate of the lower right corner of the subform. You can also change the value by clicking the |
Direction | Select the direction of records designed in a subform. Records designed in a subform will be printed next to the previous records.
|
Do not print empty subform | Specify whether to print only the subform frame of the link-subform when data output is completed within the link source. When the check box is selected, the subform frame is not printed if there is no data. |
No relation between group-suppress and key-break | Specify whether to coordinate the group-suppress of key fields with the key-break. When the check box is selected, they are not coordinated. |
Fix frame size regardless of record count | Set whether to print the ruled lines to fit the size of the subform frame when the detailed data ends in the middle of the subform. If you select the check box, ruled lines are output to fit to the size of the subform frame. 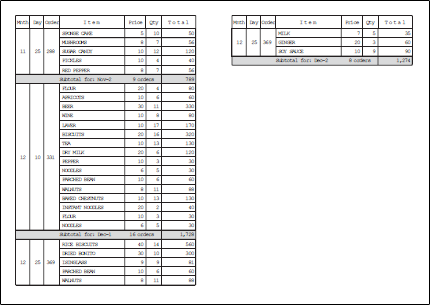 When the output range of ruled lines fits to the amount of output data 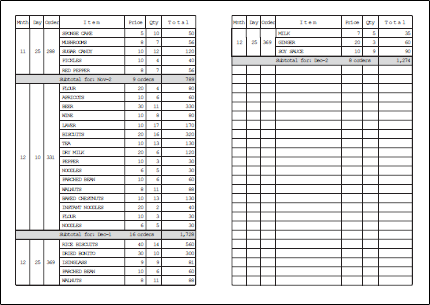 When ruled lines are output up to the size of the frame regardless of the amount of output data ReferenceWhen multiple detail records are created, the border of the detail record designed at the top is repeatedly output as ruled lines. |
Print mode | Set the printing order for records when a key-break is specified.
|
Attribute-formula | Specify an attribute-formula. For details on attribute-formula, see "6-3-1 Set attribute-formula". |

Line
Item | Description |
|---|---|
Show outer frame | Specify whether to display a frame. If you select the check box, a frame is displayed. |
Line type | Select a ruled line type to print. Restriction
|
Line width | Select the line width. If you have selected Free(dot), set the line width freely in Line width(dot) shown below. |
Line width(dot) | If you have selected Free(dot) in Line width, set the line width in dots. You can also change the value by clicking the RestrictionWhen the line is longer than 30,000 pixels, the line width may not be displayed correctly. |
Frame type | Specify the frame type from either All or Each. When Each is selected, you can specify the line type, show/hide, and the line width for each side. |
Corner type | Select the shape of the corners of the rectangle.
|
Apply corner type(upper left) Apply corner type(lower left) Apply corner type(upper right) Apply corner type(lower right) | Select the corner positions where the shape is to be changed. This can be specified only when Frame type is All. If you select a check box, the corner appears in the shape selected in Corner type. If you clear a check box, the corner will be right angle. |
Corner radius(dot) | Specify the corner radius when you select Cut, Round, or Inverted round in Corner type. |
Line color pattern (Only in graphic mode) | Specify the fill pattern of the frame. |
Hatching | Specify the tile pattern if you have selected Hatching in Line color pattern. |
Hatching line width(dot) | Set the hatching line width if you have selected Hatching in Line color pattern. |
Hatching line interval(dot) | Set the hatching line interval if you have selected Hatching in Line color pattern. |
Gradation direction | Specify the direction of the frame line gradation from the start color to the end color if you have selected Gradation2 in Line color pattern. The gradation changes depending on the end color and the type. 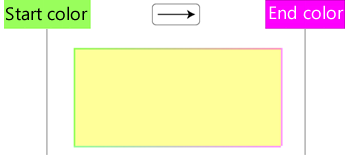 Gradation when |
Line color2 | Specify the tile line color if you have selected Hatching in Line color pattern. Specify the end color of the gradation if you have selected Gradation2 in Line color pattern. |


Multi-page
Item | Description |
|---|---|
Line color of page n ("n" is any number) | Specify the print color for the subform frame for each page. For details on the print colors, see "4-11 Color setting for items". |
Enlarge or reduce a subform
You can change the area size by enlarging or reducing a subform.
Use the following procedure to enlarge or reduce a subform:
Select a subform and move the pointer near the square handle displayed around the subform.
The pointer changes to
 .
.Drag the mouse in the desired direction referencing the guidelines.
A subform is enlarged or reduced, and the area size is changed.
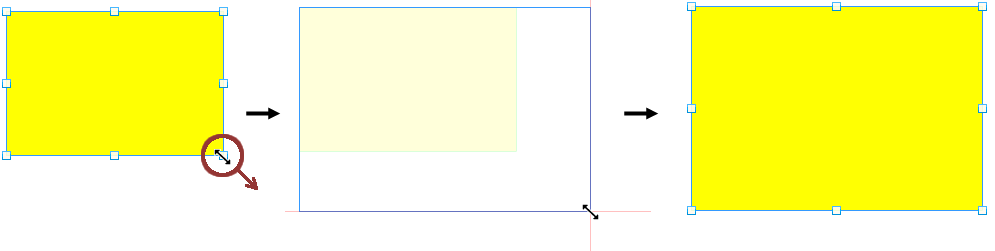
Area size is enlarged in the drag direction
Place a new item in a subform
When new items are placed in a subform, a hierarchical relationship is automatically created, and the items are set to fit within the subform area.
To manage this hierarchy, select Hierarchy in the Items window. The tree that represents hierarchies is called the "hierarchy tree".
For example, if only a subform is created, the hierarchy tree looks like this:
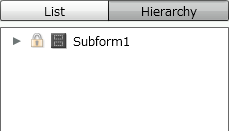
Hierarchical tree with only subform created
When you place an item in a subform, that item is added under the corresponding subform in the hierarchy tree.
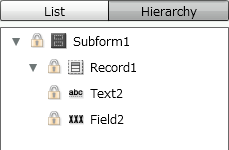
Items are placed in the subform
Reference
Items placed under a subform in the hierarchy tree cannot be moved out of the subform area in the Form Editor.
To move an item under a subform out of the subform area, drag the item while pressing CTRL.
Caution
When deleting a subform, a confirmation message appears, stating "The selected item contains sub items that will also be deleted. Do you want to proceed?".
Clicking the Yes button deletes all the items under the subform hierarchy as well.
Remove an item from the subform hierarchy
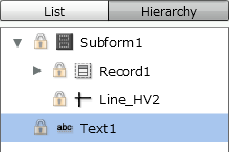
Items under the subform hierarchy cannot be moved outside the subform area. To move such an item out of the subform area, you must remove the item from under the subform in the hierarchy tree and move it to the same hierarchical level as the subform.
Select an item to be placed outside a subform area in the hierarchy tree and click the
 Move to another level of the hierarchy button.
Select an item to be placed outside a subform area
Select None in the Move to another level of the hierarchy dialog, and click the OK button.
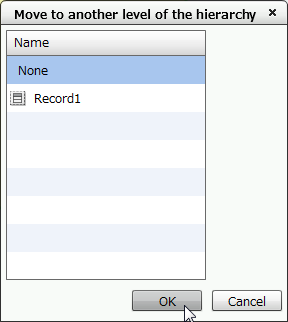
Select "None" from the "Move to another level of the hierarchy" dialog
The selected item is placed at the same hierarchical level as the subform.
Item is removed from the subform hierarchy
Reference
Items removed from under a subform in the hierarchy tree can be moved out of the subform area in the Form Editor.
Place an existing item under the subform hierarchy
To place items placed outside the subform area under the subform hierarchy, operate in the Item window.
Select an item to be placed under a subform from the Items window which appears by clicking the
 Items button, and click the Move to another level of the hierarchy button.
Select an item to be moved in the hierarchy tree in the "Items" window
Select the desired subform from the Move to another level of the hierarchy dialog, and click the OK button.
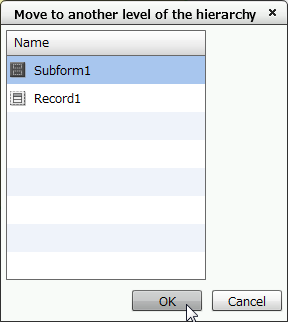
Select the corresponded subform in the "Move to another level of the hierarchy" dialog
The selected item is placed under the subform.
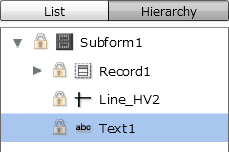
Item is placed under the subform hierarchy
Reference
Items placed under a subform in the hierarchy tree cannot be moved out of the subform area in the Form Editor.
To move an item under a subform out of the subform area, drag the item while pressing CTRL.
Restriction
In a hierarchy tree, items can be placed under the hierarchy only in subforms, records, and formcopies. It cannot be placed under the hierarchy of other items.