4. Create procedures
Create a procedure by setting parameters, setting extraction conditions for records that output data, and so on.
Procedures are created in the following flow.
You can create procedures in either the Sandbox environment or in the production environment. However, as with the SVF buttons, it is recommended to create the procedures in the Sandbox environment and then release them to the production environment.
Create a new procedure, and set the SVF button to be associated and specify how to output forms.
Set the parameters required to run the procedure.
Set the record extraction condition that defines records of Salesforce object from which data will be output.
Confirm that the created procedure can work correctly. To execute it, the parameter values are specified on the SVF Cloud Manager screen.
Release the procedure that has been created in the Sandbox environment, etc. to the production environment so that it can be used in the production environment.
Caution
If you change the SVF button settings after creating the procedure, the changes will not be reflected in the procedure, so correct the procedure settings as necessary.
Create a new procedure
In SVF Cloud Manager, click
 Procedure.
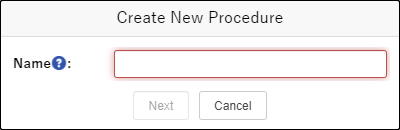
Click the New button.

Specify any value for Name and click the Next button.
If the Salesforce login screen appears, enter login information to login.
Caution
Name cannot be changed later.
Reference
When calling a procedure from Apex class, use the procedure's Name specified here.
Select the Salesforce object where the button was created in Salesforce Object, and select the SVF button in SVF Button.
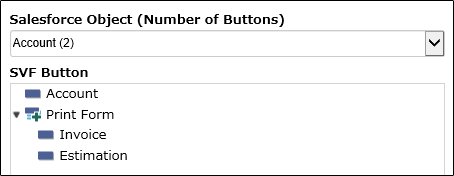
Caution
Salesforce Object and SVF Button cannot be changed later.
Select the output method of the form in Action.
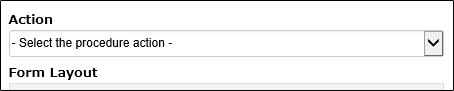
Caution
Action cannot be changed later.
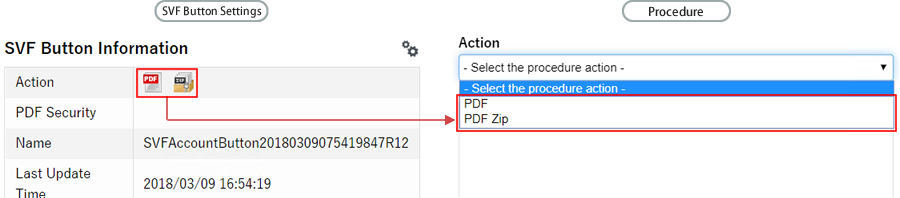
Reference
Available output methods
In Action, you can specify the output methods that are enabled in Action of SVF Button Information in SVF Button Settings.
Click the Finish button.
Set parameters
Set the parameters required to run the procedure.
When creating a new parameter, it is automatically set with the default values according to the settings of the SVF button and action.
However, for Direct Print, you need to specify the printer ID in the "printer" parameter.
Click the Edit Parameter button.

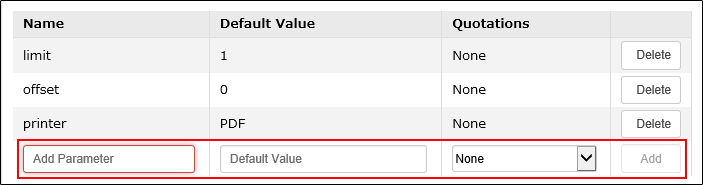
Set the parameter items, and click the Add button.
Default Value
Sets the value to be used when no value is specified from the Apex class.
For example, set "1" as the default value in "limit" (parameter of the upper limit of records) to prevent outputting of data of a large number of records unintentionally when "limit" is not specified from the Apex class.
Quotations
Set to add quotation marks to parameters.
For specific setting examples of parameters, see each sample in "Output forms" and "Parameters for procedure".
If you want to edit the existing parameter details, delete the parameter and set it again.
Click the Finish button to save your edits.
Set query condition
Set the record extraction condition that defines records of Salesforce object from which data will be output.
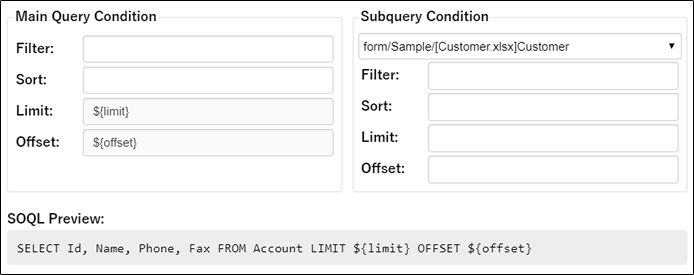
Main Query Condition is the extraction condition for the parent object (the object specified as a data source), and Subquery Condition is the extraction condition for the object detail. Subquery Condition can be set for each form layout set in the SVF button.
Click the Edit Query Conditions button.

In the item of Main Query Condition or Subquery Condition, set SOQL or the specified parameters ("$ {<parameter_name>}", for example, "${id}"), etc.
The value set in the item is reflected in the SOQL clause issued when the procedure is executed. You can confirm the SOQL to be issued in SOQL Preview.
The items are associated with SOQL clauses as follows.
Setting item
SOQL clause
Filter
WHERE clause
Sort
ORDER BY clause
Limit *1
LIMIT clause
Offset *1 *2
OFFSET clause
*1: Limit and Offset of the main query condition cannot be changed from the initial value.
*2: The Offset feature of the subquery condition is a pilot feature of Salesforce. Please use it after understanding that it is not supported by Salesforce.
For specific setting examples of query conditions, see each sample in "Output forms".
Click the Finish button to save your edits.
Verify the procedure
Verify the behavior of the procedure by specifying the values of the parameters on the screen. (No points are consumed.)
From the list, select the procedure whose behavior you want to verify.
Click the Execute button and specify values for each parameter.

When you click the Execute button, the procedure is executed and the form is output. Check the output form, and correct the procedure settings as necessary.
Release the procedure
If you created the procedure in the Sandbox environment, release it to the production environment. You need to have released the SVF button in the environment to release to.
After releasing the procedure, verify the operation of the procedure in the environment to release to.
Caution
If you attempt to release a procedure to the environment in which the same name procedure exists, it will be overwritten with the data to be released.
Select the procedure to be released from the list.
Click the Release button. Select the production environment, and click the OK button.
