2-2-3 Prepare image data
In order to output image data to a form from SVF Cloud, you must prepare them by one of the following methods.
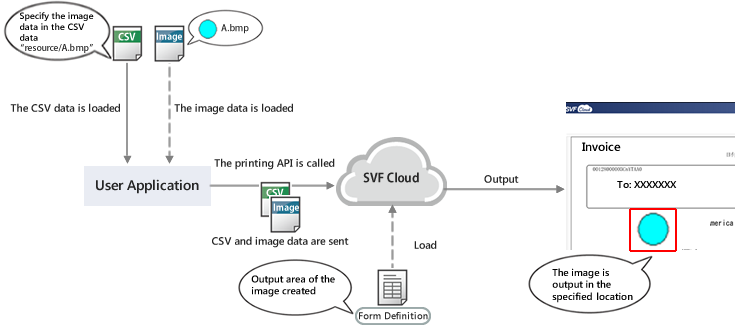
Place image data by sending from user application
When calling a printing API from a user application, if you send image data along with the CSV data, the image data is output in the location specified by the form definition. The sent image data is deleted when printing finishes.
This is useful when you want to output different images for each product in a product details list, for example.
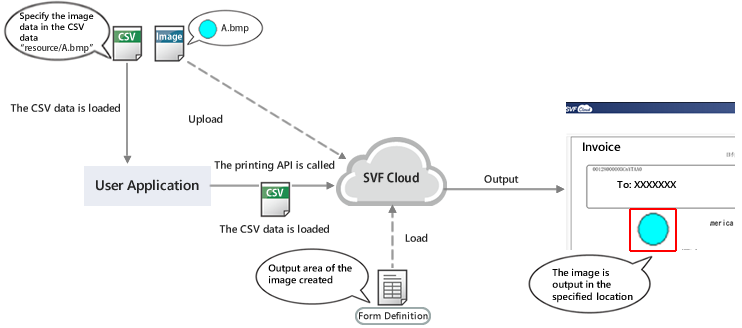
Place from SVF Cloud Manager
Upload the image data to be output from SVF Cloud Manager to SVF Cloud in advance. If you call the printing API from a user application, the image data is output in the location specified in the form definition.
Since you can use the uploaded image data multiple times, this is useful for outputting images that are rarely changed, such as a company logo. For details on how to upload, see "Upload image data from SVF Cloud Manager".
Upload image data from SVF Cloud Manager
Log in to SVF Cloud Manager.
Click
 Resource.
Under the "resource" folder, select the folder to upload images. Click
 - Upload File, and select the file to upload on the selection screen.
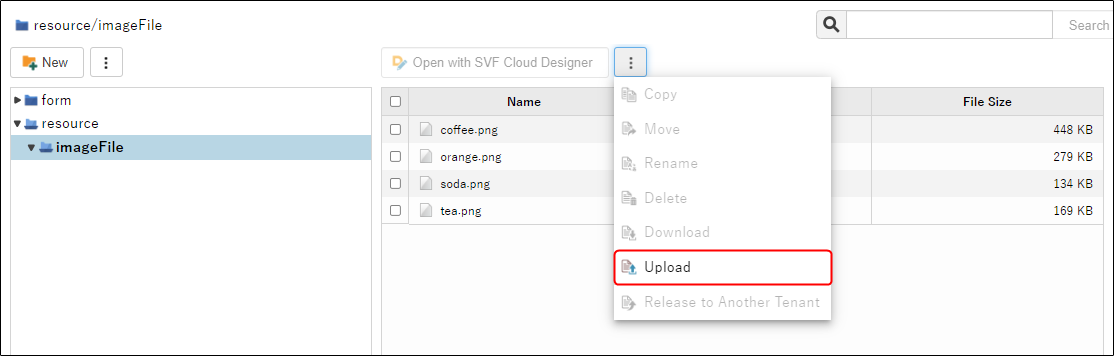
Specify the hierarchy under the resource folder for {path} in order to specify the path of image data. For example, if you want to output "resource/imageFile/coffee.png" on the Resource screen, specify "imageFile/coffee.png".